


Commissioning product photography for the first time tends to raise the same three questions: what does a professional shoot actually include, who owns the images afterwards, and how long before the files land in your inbox? They're fair questions, and the answers shape your budget more than the day rate does.
This guide walks through how we plan and run shoots at our product photography studio in Leeds — the brief, the shot list, the legal side, and what happens between the last frame and delivery — so you can book a session knowing exactly what you're paying for and what you'll get back.
What a professional product shoot includes
A commissioned shoot isn't one image style. Most briefs combine several shot types in a single session, because each does a different job once the images go to work.
- Pack shots — clean, true-to-colour images of the product as sold, for catalogue and spec pages.
- White-background shots — the product isolated on pure white, the default for marketplace listings and comparison grids.
- Hero images — one polished shot built to lead a homepage banner or campaign.
- Lifestyle shots — the product in context or in use, giving shoppers a sense of scale and application.
- 360 or turntable sequences — rotating views that let online shoppers inspect the product from every angle.
If you're not sure which of these your listings actually need, our guide to product image types breaks them down one by one.
Retouching sits on a scale too. Basic retouching covers dust removal, colour correction and consistent crops — usually enough for straightforward pack shots. Advanced retouching takes in compositing, texture correction on fabrics and metals, and shadow rebuilding, which is standard for hero images or anything going into paid advertising.
Agree file delivery before the shoot, not after. Expect layered masters, flattened high-resolution files for print, and marketplace-ready crops sized to each platform's rules. Turnaround matters here as well: retouched images back within 48 hours changes how quickly a listing or campaign can go live, which is often the deciding factor when a launch date is fixed.
The brief, the shot list and the call sheet
The brief is the one document that decides whether a shoot runs smoothly or overruns. Treat it as a working tool, not a formality.
- State your objectives and deliverables first, including which channels each image will serve — ecommerce, packaging, paid social.
- List every product variant that needs shooting, with SKUs or reference codes, so nothing gets missed on the day.
- Attach reference images showing the angle, lighting mood or composition you want matched.
- Build the shot list with exact specifications — aspect ratio, orientation, crop margins, quantity per variant. Marketplaces often demand specific crop ratios, so confirm these before the shoot rather than during editing.
- Prioritise the list, so the must-haves get shot first if time runs short.
- Draft the call sheet with the studio — timings, contact names, prop and styling notes, and a contingency slot for reshoots. A call sheet works as the shoot's operational manual: who's doing what and when, and how the day absorbs a delay without losing the schedule.
Send your shot list at least a week ahead. It gives the studio time to flag technical issues — reflective packaging, oversized items — before the day, not during it. Our product photoshoot planning guide includes a shot-list template you can adapt directly, and once the list is locked, use it to agree props and styling: who's sourcing what, whether a stylist is needed, and what happens if a product arrives damaged.
Getting shoot day right
Shoot day runs on the preparation done beforehand, not improvisation on the morning.
- Clean and inspect every unit before it travels. Scuffs, fingerprints and packaging damage all show up under studio lighting.
- Bring spares of anything fragile or small — one damaged sample can stall a shoot if there's no backup.
- Label variants clearly (colour, size, SKU) so the crew can match products to the shot list without guesswork.
- Pack for the return trip, not just the outbound one — especially retail-ready items that need to go back on shelf afterwards.
- Decide who sources props and styling. Some brands bring their own; others ask us to source neutral staging. A stylist is worth budgeting for when texture or arrangement is central to the shot.
It's also worth knowing the two broad hire models. Dry hire gives you the space and kit with no crew, which suits brands with their own photographer. A staffed commercial session adds a photographer, assistant and retoucher — the lower-risk option if there's no production team in-house, or simply no time. Half-day bookings cover straightforward single-product runs; full days suit multi-variant catalogues or anything needing styling changes between setups.
On the day itself, build in an approval checkpoint after the first few shots, so lighting, crop and colour are confirmed before the crew works through the full list. Timebox each setup, and agree in advance what happens if a product arrives late or a variant is missing. Better a contingency plan than a discovery mid-shoot.
Who owns the images? Rights, licences and advertising rules
In the UK, copyright in a photograph sits automatically with the photographer who took it, for the life of the creator plus 70 years — and commissioning a shoot does not transfer that copyright by default. Brands normally licence the right to use images rather than own them outright, which is why the licence terms matter as much as the shoot itself.
A clear licence protects both sides: the photographer keeps the copyright, and the business gets the rights it actually needs, named in writing. Before signing off a brief, check the agreement covers:
- Exclusivity — whether competitors can be refused the same imagery.
- Territory and duration — where, and for how long, you can use the images.
- Media scope — print, digital, paid social, packaging, each named explicitly.
- Upgrade options — whether you can buy fuller rights later if your needs grow.
Advertising rules add another layer. The CAP Code governs non-broadcast advertising in the UK, and any pack shot used in a marketing communication must not mislead about size, colour or function — even implicitly. Keep the metadata embedded in your master files and store them separately from your marketplace crops; the Intellectual Property Office recommends copyright marking as standard practice for managing image rights.
Lighting, kit and camera settings
Lighting is where studio work earns its keep over anything shot in available light at home — and in Leeds, where the light can change in the time it takes to make a coffee, a controlled setup is half the point.
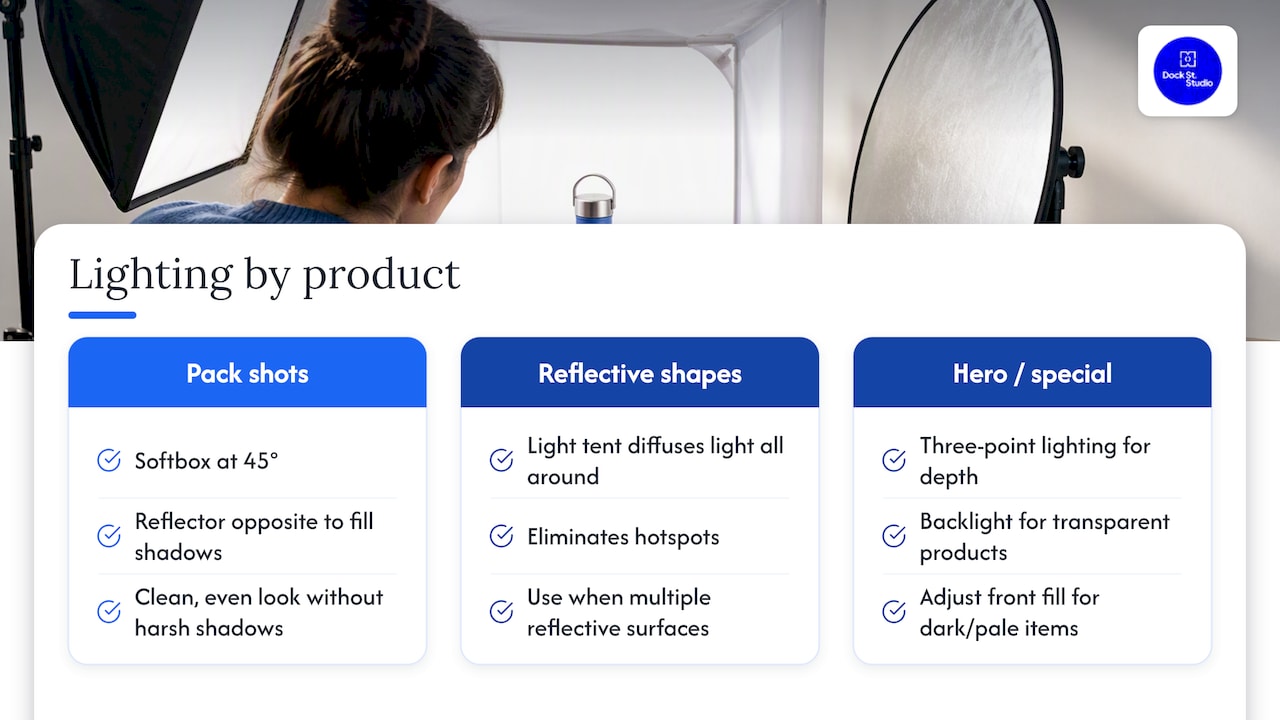
A single large softbox at 45 degrees to the product, with a reflector opposite to fill the shadows, is the standard setup for most pack shots: clean and even, with no harsh edges. Products with awkward shapes or several reflective surfaces do better in a light tent, which diffuses light from all directions and kills the hotspots a single softbox can't. Three-point lighting — key, fill and backlight — suits hero shots, where separation from the background gives the image depth. Backlighting on its own works well for transparent products, showing liquid or internal detail clearly. Dark, matte products usually need extra fill from the front; pale or white ones need slightly less, to keep the highlights intact.
On the camera side, a full-frame body with a macro or standard prime covers most product work — sharp detail without the distortion a wide lens introduces on small objects. A sturdy tripod is non-negotiable, because product photography depends on pixel-level sharpness across a long shot list. A narrow aperture (around f/8 to f/16) keeps the whole product in focus, and a low ISO (100 to 200) keeps noise out of images that shoppers will view at full zoom. We also shoot tethered, with the camera feeding straight into a monitor, so focus, lighting and colour get checked on a big screen before the next setup — errors caught there never become reshoots. A grey card or colour checker shot at the start of the session keeps colour consistent across the whole run, which matters when colourway variants need to match exactly after retouching.
Backgrounds, styling and awkward products
Background choice depends entirely on where the image will live. Pure white (RGB 255,255,255) is the default for marketplace listings — most platforms require it for the main image — while grey or neutral tones suit catalogue shots that want a softer look without full isolation. Lifestyle and hero shots benefit from context: a styled surface, a complementary palette, props that suggest scale without competing. The rule that holds across all of it is restraint. Props should support the product, and a cluttered background reads as unprofessional rather than aspirational.
Watch the tones, too. A background too close in colour to the product makes edges hard to define, which complicates clean cut-outs for ecommerce crops. We keep seamless paper backdrops in a few standard tones for exactly this reason — swapping between setups takes minutes.
Some products need particular handling, and it's worth flagging them in the brief so the right lighting is set up before you arrive:
- Reflective products — glassware, jewellery, polished metal — pick up every light source in the room, including the camera. Diffused light tames the hotspots, and angling the product slightly off the camera's direct line often removes a reflection without any editing. A black card just out of frame controls glare on curved surfaces.
- Textiles have the opposite problem: flat light washes out weave and texture. Raking light at a low angle brings out the grain and stitching a shopper wants to see — and steaming garments before the shoot beats retouching out creases afterwards.
- Transparent products — bottles, glassware with liquid — need a backlit setup to show the contents clearly.
Retouching and delivery
Editing product images follows a different rhythm to portrait work, because consistency across a full catalogue matters more than individual artistic treatment.
The first pass is technical: colour correction against the reference grey card, exposure matching across the shot list, and cropping to the exact specifications in the brief. Much of this runs as batch processing — which is partly how a full catalogue can come back within 48 hours rather than being edited image by image. The second pass handles anything needing individual attention: dust spots, compositing onto a new background, shadow correction, texture work on reflective and fabric items. That's where advanced retouching time goes, and it's the stage most likely to slip if the brief wasn't clear about which shots need the heavier work.
Export settings matter as much as the editing. Marketplaces specify exact file sizes and colour profiles, so exporting straight to those specifications avoids a second round of corrections after delivery. Our partner guidance on preparing images for ecommerce platforms covers how file preparation affects listing performance, worth a look if you're managing a large catalogue across several channels.
Where shoots go wrong (and how planning saves money)
Most problems on a product shoot trace back to one of three causes: unclear specifications, product issues discovered too late, or lighting that wasn't matched to the material.
Colour inaccuracy is the complaint that comes up most often after delivery — usually because no reference card was shot at the start of the session. Inconsistent crops across a range, with some images slightly off-centre or at a different scale, almost always stem from a shot list that never specified crop margins. Reflections on glossy products are the most common on-the-day fix, solved with diffusion or repositioning rather than heavy retouching. And missing or damaged units, discovered only once unpacked in the studio, are avoidable with a pre-shoot checklist that confirms spares and condition before anyone arrives.
None of these is difficult to solve on its own. But the shoots that run over budget are almost never the ones where something went wrong on the day — they're the ones where the brief was vague about shot counts, crops or variants. A clear shot list cuts the number of retouch rounds, fewer reshoots mean you don't pay for studio time twice, and a brand that plans properly tends to get usable assets on the first pass rather than the third.
Inside our product photography studio in Leeds
If you're weighing up commissioning a shoot against doing it in-house, the practical difference comes down to planning and turnaround. We build every product photography session around a detailed pre-shoot brief, so studio time goes on shooting the list rather than working out what the list should be — with staffed sessions from £450 to £750 depending on scope, full kit and an experienced crew included, and dry hire from £125 if you're bringing your own photographer.
To get started, send us your shot list with quantities and variants, a few reference images for lighting or styling mood, and your deadline with the channels each image is for. We'll turn that into a call sheet, confirm timings, and talk anything uncertain through properly before you book.
Frequently Asked Questions
What does professional product photography cost?
It depends on scope and the number of shots. Our product photography sessions run from £450 to £750, and if you'd rather bring your own photographer, studio hire starts at £125 for dry hire, up to £300 for a full staffed day.
Who owns the copyright to commissioned product photos?
Under UK law, copyright sits with the photographer automatically, for the life of the creator plus 70 years — commissioning a shoot doesn't transfer it by default. Brands normally agree a licence covering specific uses, territories and media instead.
How quickly do we get retouched images back?
We deliver retouched images within 48 hours of the shoot. Heavier work — compositing, or texture correction on reflective and textile products — can add a little to that, and we'll tell you up front if it will.
Do product images used in advertising need to follow specific rules?
Yes. Images used in UK marketing communications fall under the CAP Code, which says pack shots and visual claims must not mislead — even when the claim is only implied by the picture rather than written down.
Should we book a photographer or just hire the studio?
Neither is automatically better. Dry hire suits brands with their own photographer who just need the space and kit; a staffed session adds a photographer, assistant and retoucher, which earns its keep when there's no production capacity in-house.
Where is the studio, and how do we book?
We're at Dock Street Studio, Unit 9, 30–38 Dock Street, Leeds LS10 1JF — near Leeds Dock, a short walk from Leeds train station, with onsite parking. Book online, email mark@isophotographic.org or call 0113 4400102.
Sources
- Gov.uk — Copyright notice: digital images, photographs and the internet
- The CAP Code
- The Photography Show: your questions answered — Intellectual Property Office blog
Book your product shoot in Leeds
Bring us the shot list — or just the rough idea — and we'll help you work out what will earn its keep. Book online, email mark@isophotographic.org, or call 0113 4400102.
Written by Mark Wheelwright
Commercial photographer & studio owner, Leeds | ISO Photographic Ltd
Dock Street Studio, Unit 9, 30–38 Dock Street, Leeds LS10 1JF
18+ years' experience | 900+ projects | 300+ five-star reviews | 1M+ shutter count
dockstreetstudioleeds.co.uk
Shot, written and built by the Dock Street team
Every guide on this blog comes from the team at Dock Street Studio — Mark behind the camera with 18+ years' experience, Nicole on styling and lighting, Beya on video and bookings and Austin keeping the site fast and findable. If you'd rather have us do it than read about it, book a session or explore our photography services in Leeds.