


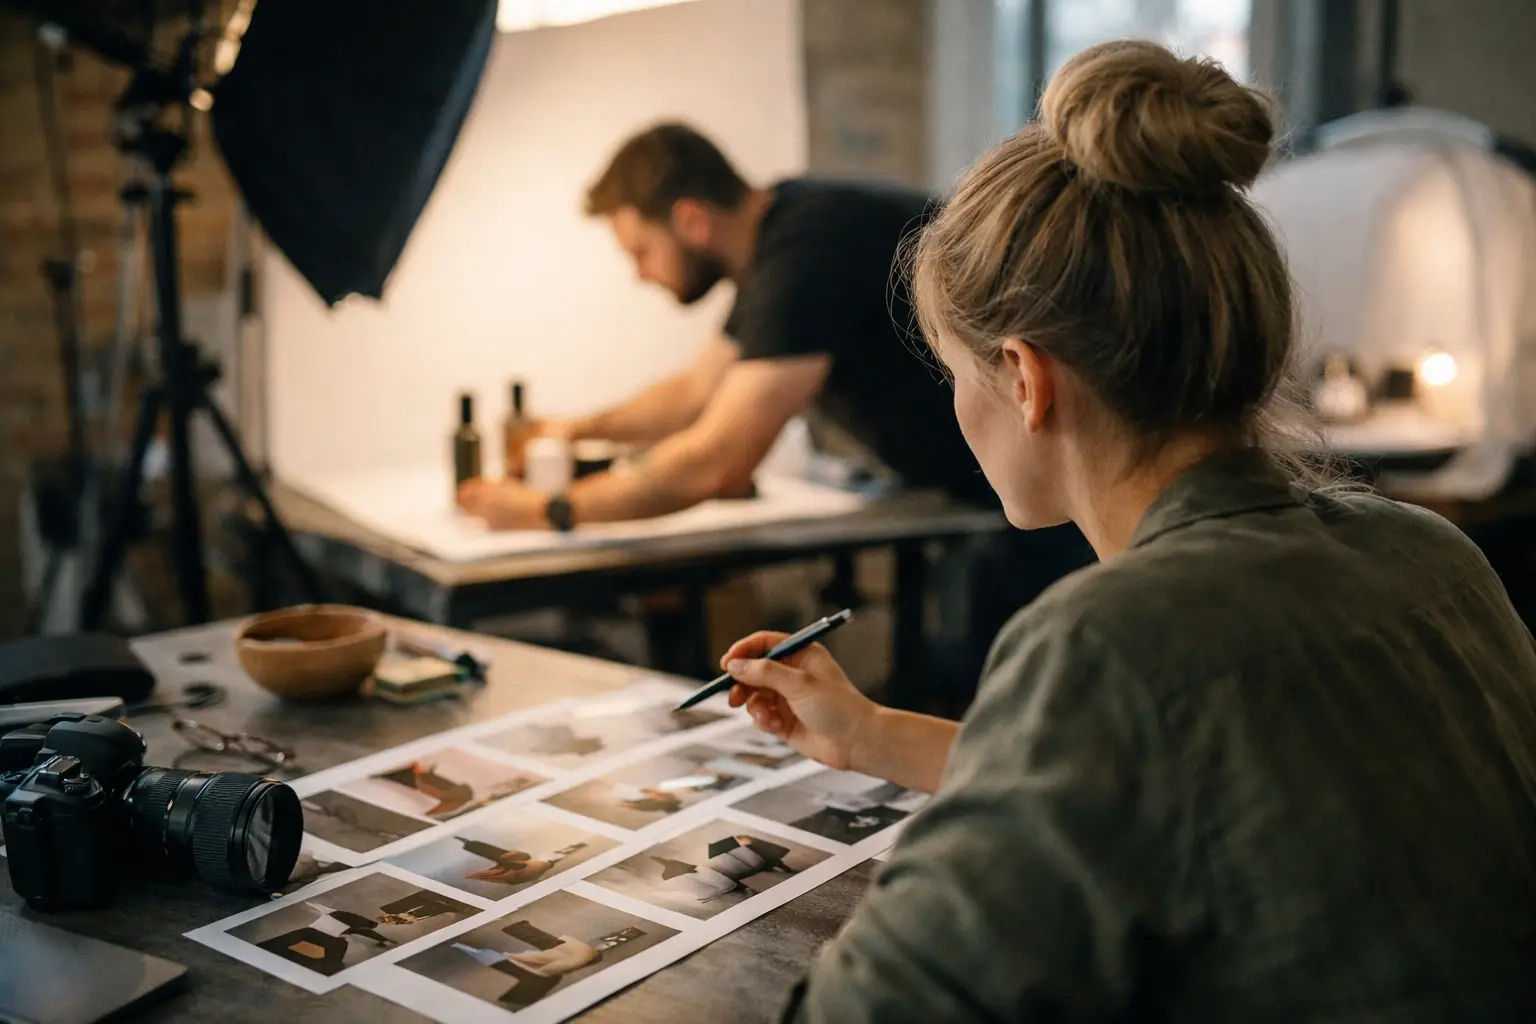
To plan a product photoshoot, decide where the images will be used, write a shot list with SKUs and required angles, agree the visual direction in advance, and send clean, shoot-ready stock with spares. Most product shoots fail on preparation, not on lighting or camera choice.
A good product shoot can go badly wrong before a light is switched on. The usual culprit is not the camera or the studio. It is a vague brief, missing stock, or a last-minute realisation that nobody has decided where the images will actually be used. At Dock Street Studio, a commercial photography studio on Dock Street in Leeds (LS10), we work with everyone from independent Yorkshire makers launching a first collection to established teams updating hundreds of ecommerce listings. The products may be very different, but the planning principles stay much the same.
This product photoshoot planning guide is designed to help you arrive prepared, protect your budget and leave with photographs that earn their place on your website, social channels, packaging or press material.
What job do the photographs need to do?
Before discussing backgrounds, props or lighting, decide what success looks like. A clean packshot for an online shop has a different job from a campaign image for a new skincare range. One needs consistency, clarity and accurate colour. The other may need mood, texture and room for headline copy.
Think about where each image will appear. Your website product page, marketplace listings, a printed brochure, Instagram, retailer submissions and editorial press packs all have different requirements. Some marketplaces insist on a plain white background. A banner image may need a wide crop with empty space on one side. A square social post might need a tighter composition.
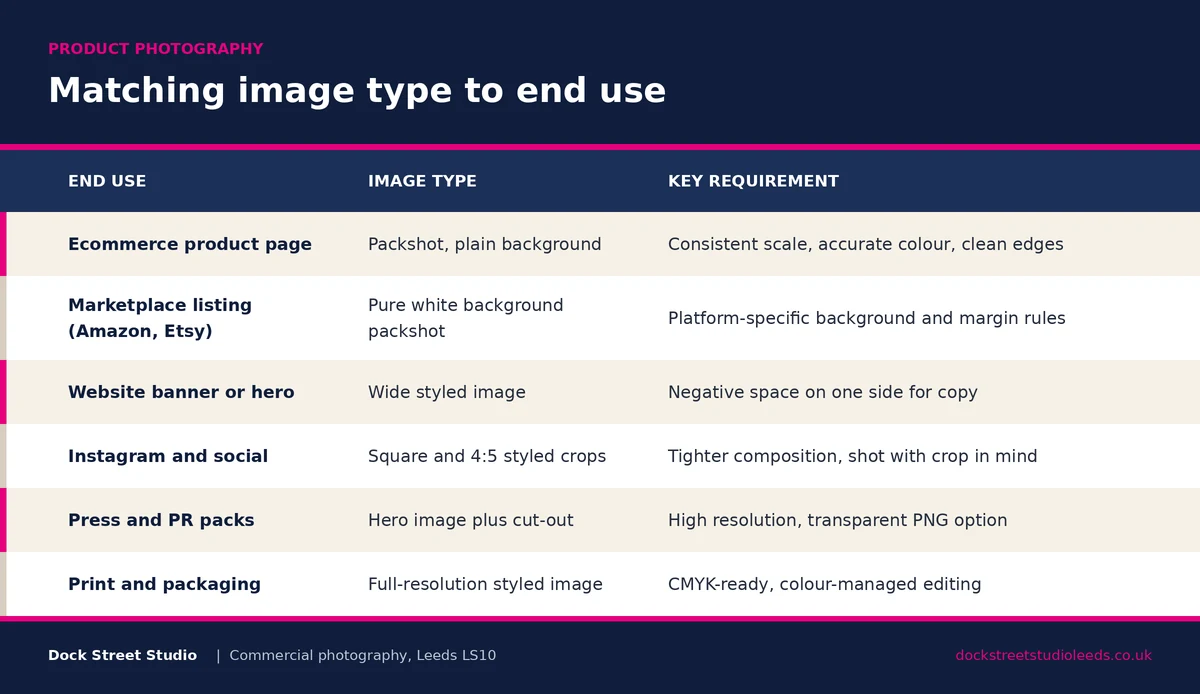
Tell us which uses matter most. This helps us set the lighting, framing and file sizes correctly from the start, rather than trying to force one image to do every job later.
How do you set priorities rather than a wish list?
Most brands have more ideas than there is time to shoot. That is perfectly normal. The answer is to separate essential images from useful extras.
For each product, identify the non-negotiables. These might be a front-on packshot, the rear label, a detail of a key feature and one styled image. If time allows, you can then add alternative angles, seasonal content or experimental set-ups. This keeps the day moving if a prop fails to arrive or a complicated arrangement takes longer than expected.
It also helps to be honest about volume. Photographing ten products in one lighting set-up is very different from photographing ten products, each with its own styled scene. The latter can be worth it, but it needs more time for building, testing and resetting.
What should a product photography shot list include?
A shot list does not need to be complicated. A shared spreadsheet is often enough. What matters is that everybody can see exactly what needs photographing and what needs to be delivered. Include the product name or SKU, colour or variant, required angles, whether it needs a plain-background image or styling, and any notes about features that must be visible.
Add a reference image where it helps. A rough phone screenshot is often more useful than a long description of the look you have in mind.
Be specific about variations. If a jumper comes in five colours, decide whether all five need full coverage or whether one colour will be photographed from every angle and the others only from the front. If packaging is changing next month, do not send the old version unless it is deliberately part of the brief.
How far should you agree the visual direction before shoot day?
Mood boards are useful when they answer practical questions. They can show whether you want bright, fresh images with crisp shadows, or softer light with a more editorial feel. They can also show the scale of the product in use, the level of retouching expected and the sort of props that fit the brand.
Try not to treat reference images as a strict copy-and-paste instruction. A picture may have been made with a large crew, a bespoke set or a product that behaves very differently to yours. We can match the feeling and visual principles while creating something appropriate for your budget, products and brand.
If colour is central to the sale, flag it early. Cosmetics, paint, food, fabric and coloured packaging all need careful lighting and colour-managed editing. Sending a physical swatch or approved packaging sample can be helpful where accuracy is critical.
How should you prepare products before sending them to the studio?
Prepare every item as if it is going on display. The camera sees dust, fingerprints, creased labels and scuffed boxes with ruthless efficiency. Retouching can deal with small distractions, but it should not become a substitute for sending clean, finished stock.
Check every item before it leaves your premises. Remove price stickers and protective film unless either is meant to appear. Bring spare products, particularly for food, cosmetics, glass, fragile items and anything with easily marked surfaces. A backup can save a surprising amount of time.
Preparation checklist by product type
- Clothing: steamed, lint-rolled and on suitable hangers.
- Bottles and jars: labels applied straight, glass polished, caps aligned.
- Jewellery: polished, with a cloth on hand for touch-ups between frames.
- Flat-packed items: allow assembly time and bring the tools needed.
- Electronics: charged and working, with chargers or spare batteries packed.
- Food: multiple portions, kept cool, plus fresh garnish and ingredients.
Small practical details matter too. Put each product and its accessories together in labelled bags or boxes. If there are different versions of a similar item, label them clearly. This prevents the wrong lid, cable or colourway appearing in a photograph.
How do you choose styling and props that support the product?
Props can add context and make a product feel more desirable, but they should never create confusion about what is for sale. A beautiful image that makes viewers ask whether the vase, flowers or tray is included has not done its job.
Choose a small number of props that reinforce the brand. A handmade candle might suit natural textures and a calm domestic setting. A technical product could need clean surfaces and a more precise look. A food brand may need ingredients that explain flavour, but only if they look fresh throughout the shoot.
Keep an eye on scale. A tiny product can disappear beside oversized props, while a large object may need plenty of clear space around it. We often test a simple arrangement first, then build only where the product still reads clearly.
There is a trade-off here. Styled content is flexible and attention-grabbing for campaigns, but it is not always the best choice for ecommerce galleries. In many cases, a balanced mix works best: reliable, consistent packshots for the product page and a smaller set of styled images for advertising and social content.
How do you plan studio time efficiently?
The most efficient shoots group tasks together. If several items need the same plain background and lighting, photograph them in sequence. Once that set-up is finished, move on to styled work or close details. Rebuilding the same lighting later costs time and breaks the rhythm of the day.
Allow room for the things that take longer than expected. Reflective products such as glass, chrome and glossy packaging require careful control of what the surface reflects. Clear bottles can need more shaping than opaque ones. Clothing, large products and food styling all involve their own preparation time.
If you are hiring a studio to produce the images yourselves, check the kit and access arrangements in advance. Confirm what lighting, stands, backgrounds, tables and grip equipment are available, as well as loading access and storage. In central Leeds, planning transport and unloading is particularly worthwhile if you have bulky stock or several crates arriving at once.
If we are photographing for you, a short pre-shoot call is usually the best place to settle these details. It means the studio can be prepared for the work, rather than spending the first hour of your booking deciding what is possible. You can book a call or a shoot date here.
Who needs to be available on shoot day?
A shoot runs better when the person who can approve styling, product order and brand details is available. They do not always need to be in the studio all day. They do need to be reachable, especially where there are several variants or a specific campaign look to follow.
Agree how approvals will work beforehand. We might review key frames together as we go, or send a small selection for sign-off before moving through a larger batch. The right approach depends on the scale of the job and how fixed the visual direction is.
What should you agree about editing and delivery?
Photography is only part of the process. Ask what level of retouching is included and what you need in the final files. Basic clean-up and colour correction are normal expectations, but extensive label replacement, compositing or rebuilding damaged packaging should be planned and priced separately.
Be clear about crops too. A portrait image can be cropped into a square, but only if enough room was left around the product when it was photographed. If you need website banners, reels covers and marketplace images from the same shoot, say so at the briefing stage.
Name files in a way your team can use. Product names or SKUs are far more helpful than a folder full of camera-generated numbers. For larger ranges, sensible naming saves time when the images reach your web team, retailer or designer.
Leave room for one useful surprise
The plan should be solid, but not so rigid that there is no space for a better idea once the products are in front of the camera. Sometimes a texture, colour combination or shadow works far better in real life than it did on a mood board. That is where an experienced eye and a properly prepared shoot pay off.
Bring the right products, know which images matter most and give the creative team a clear brief. From there, we can concentrate on making photographs that look good, make sense and give your customers a proper reason to look twice. See more of our product photography work in Leeds, or get in touch to talk through a project.
Frequently asked questions
How long does a product photoshoot take?
A single lighting set-up covering ten to fifteen simple packshots can often be completed in half a day. Individually styled scenes take considerably longer, typically thirty to sixty minutes per set-up once building, testing and resetting are included. Reflective, transparent and food products sit at the longer end of that range.
How many products can you photograph in a day?
For straightforward packshots on a consistent background, 30 to 60 products in a day is realistic. For styled lifestyle images with props and set building, expect 8 to 15. The honest answer depends on how many angles each product needs, so we work this out from your shot list before booking.
What background should I use for product photography?
Plain white is the standard for ecommerce and most marketplaces, because it keeps listings consistent and meets platform rules. Textured, coloured or set-built backgrounds suit campaign, social and press imagery. Many brands shoot both in one session: white packshots for the product page, styled images for marketing.
Do I need to send spare products to the shoot?
Yes, wherever practical. Food, cosmetics, glassware, fabric and anything with a glossy or easily marked surface should arrive with at least one spare. A backup is faster and cleaner than retouching a scratch, smear or dented box after the event.
What file formats will I receive?
Standard delivery is high-resolution JPEGs plus web-sized versions, named by product name or SKU. Transparent PNG cut-outs, TIFFs for print, and platform-specific crops for marketplaces or social can all be supplied — just tell us at the briefing stage so the framing allows for it.
Where is your product photography studio in Leeds?
Dock Street Studio is at Unit 9, 30–38 Dock Street, Leeds LS10 1JF, just south of the river in central Leeds. We work with clients across Leeds, West Yorkshire and nationally, and there is loading access for bulky stock or multiple crates.
About the author
Mark Wheelwright
Commercial photographer & studio owner | ISO Photographic Ltd, Leeds
Dock Street Studio, Unit 9, 30–38 Dock Street, Leeds LS10 1JF
Mark has 18+ years’ experience photographing brands and businesses across Leeds and West Yorkshire, with 900+ projects delivered. He runs Dock Street Studio, working with clients including Clear Channel, Habitat, Kirkstall Brewery and Paystrax.
900+ projects | 300+ five-star reviews | 1M+ shutter count
dockstreetstudioleeds.co.uk
Shot, written and built by the Dock Street team
Every guide on this blog comes from the team at Dock Street Studio — Mark behind the camera with 18+ years' experience, Nicole on styling and lighting, Beya on video and bookings and Austin keeping the site fast and findable. If you'd rather have us do it than read about it, book a session or explore our photography services in Leeds.