


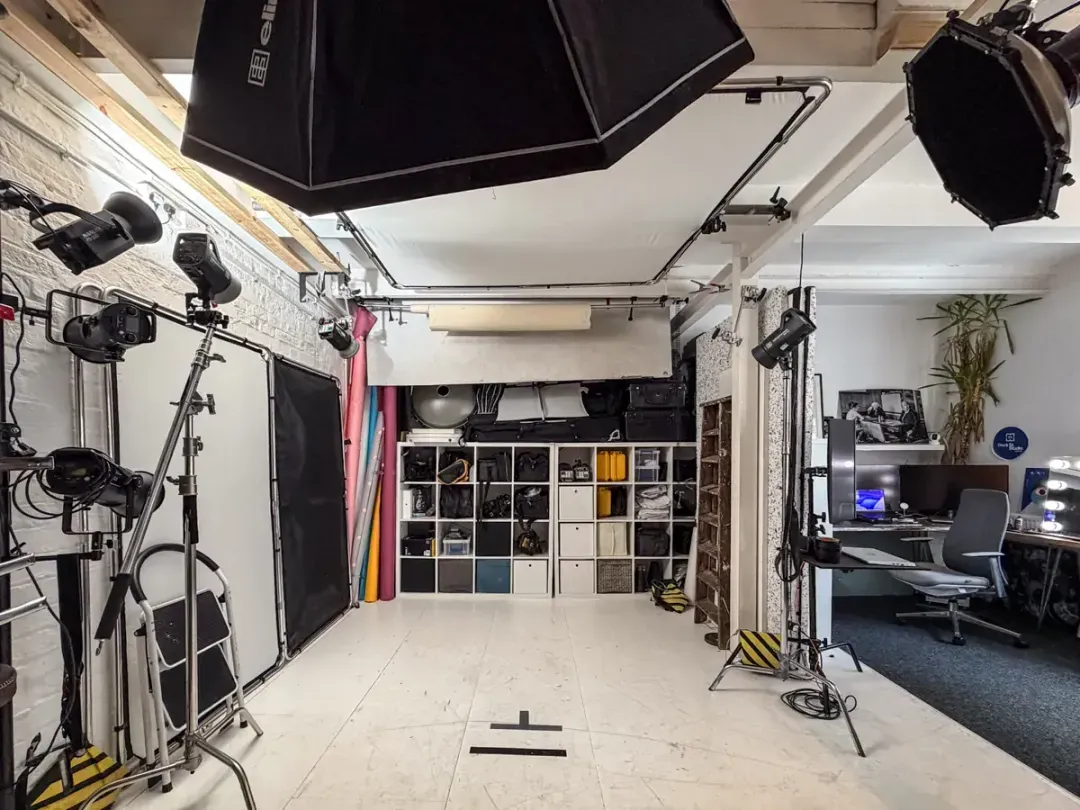
The shortest honest answer to “what’s the best podcast lighting setup?” is: a soft, diffused key light, a lower-powered fill (or a bit of white card), and a subtle back light raised behind the host. A solo host near a window can get through most episodes with one light and daylight. Interviews and roundtables need the full three-point rig if you want every guest to look like they were lit on purpose.
We light people for a living, and the same handful of adjustments do most of the work whether it’s a headshot or a two-hour recording. This guide walks through the setups, the kit worth buying or hiring, the settings that stop lights flickering on camera, and the 20-second test we run before every session at our Leeds podcast studio.
What this guide covers
- Which setup suits your format
- Setting up podcast lighting step by step
- What to buy, and what to hire
- Colour temperature and white balance
- Camera settings that work with your lights
- Lighting the background without stealing the show
- Glasses glare, flicker and other quick fixes
- Working with the room you’ve got
- Can natural light do the job?
- Buy your own rig, or hire a studio?
- Sources
- Frequently asked questions
Which setup suits your format
There’s no prize for over-building a solo show, and no excuse for under-lighting a three-guest panel. Match the rig to the format.
- One light. A quick, casual solo recording near a window. One diffused LED plus daylight from the side gives the face some shape. The far side of the face can go a bit heavy without any fill, but for a chatty solo format it’s perfectly usable.
- Two lights (key and fill). The workhorse for most solo hosts and remote interviews. The key shapes the face; the fill, often just a weaker second light or a reflector, lifts the shadows so skin reads evenly.
- Three lights (key, fill and back). The standard for interviews and anything that wants a broadcast look. The back light separates the host from the wall behind them, and it matters more on video than most new podcasters expect.
For roundtables with three or more people, you’re really building several two-light setups that share one back light run along the rear of the set. It keeps the cost sane without giving up separation.
Setting up podcast lighting step by step
Before you touch a light, get the camera right. Lens at roughly eye level, angled very slightly down, with each host’s eyeline landing just below the glass. Everything else is built on that.
- Place the key light about 45 degrees off the camera axis, a touch above eye height, angled down. Diffuse it through a softbox or bounce it off white foam board.
- Add the fill on the opposite side at roughly half the key’s output, usually a bit further back. A cheap reflector or a small second panel both do the job.
- Raise the back light behind and slightly above the host, aimed at hair and shoulders. Keep it subtle. It should separate, not glow.
- Two hosts: mirror the key and fill on each side of the frame and share one back light angled to catch both. Roundtables: treat each seat as its own key-and-fill pair fed by a common back light.
- Record a 20-second test clip. Play it back and check skin tone, the shadow under the eyes, and any glare on glasses or glossy surfaces before you commit to a full episode.
One thing we say a lot in the studio: when a face looks harsh, move the key light closer rather than turning it up. A bigger, closer, diffused source softens light far more than cranking the power on a small one across the room.
What to buy, and what to hire
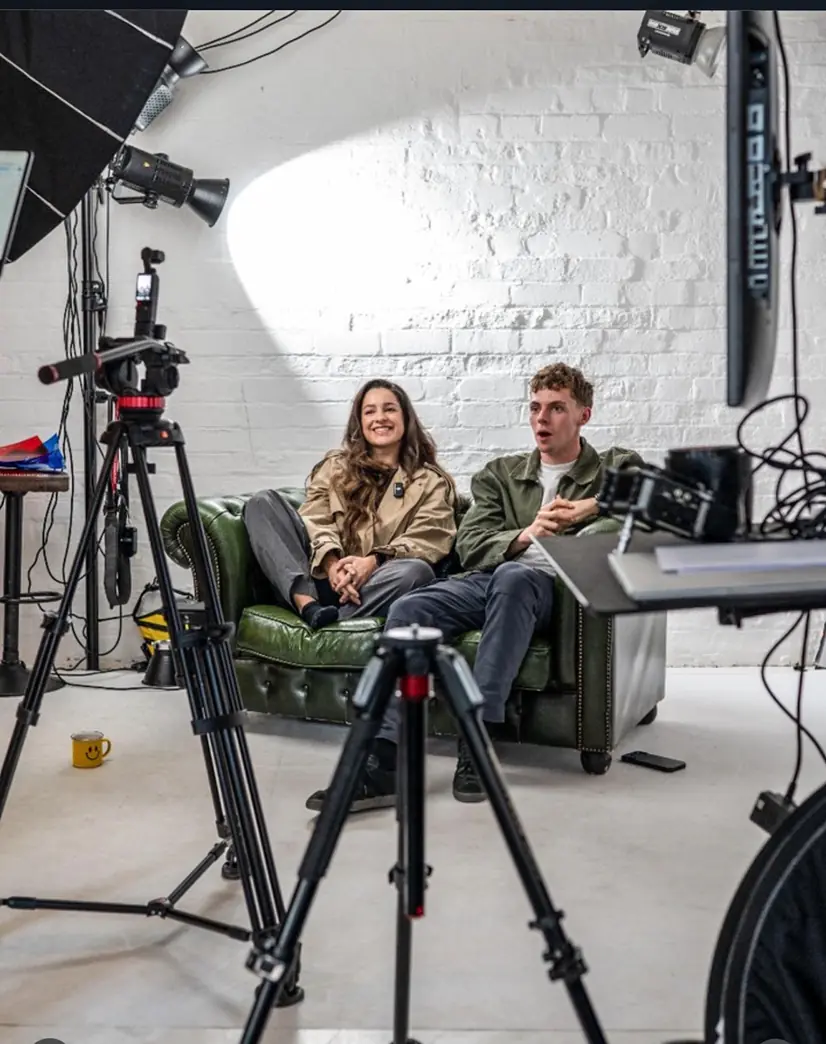
Continuous LEDs beat flash for video every time, because you see exposure and colour as they happen rather than guessing between frames. Bi-colour fixtures let you dial the colour temperature to match the room instead of fighting it. And a high CRI (colour rendering index) rating matters more than raw brightness for how skin actually looks on screen.
- Starter: one small LED panel, a clip-on softbox or diffusion sheet, and a basic stand or desk clamp. Enough for a talking-head solo show.
- Mid-range: two larger bi-colour panels or a compact COB (single-point LED), proper softboxes, and stands that won’t wobble mid-episode.
- Pro: high-CRI panels or COBs, modifiers like octaboxes, and rigging that supports multi-camera shoots without recalibrating between takes.
- The unglamorous bits that matter: sandbags for the stands, spring clamps, cable ties, and a few colour-correction gels.
Godox, Aputure and Nanlite are the names that come up again and again, and every price point uses the same core technique. Upgrading later doesn’t mean relearning your setup.
Colour temperature and white balance
Daylight-balanced LEDs sit around 5600K; tungsten-style fixtures closer to 3200K. Mix the two without correcting and you get the orange-and-blue clash that makes footage look amateur however good the framing is.
- Use bi-colour fixtures so every light in the room can be set to the same Kelvin value.
- If a practical lamp or a window is unavoidable, gel it to match your main lights rather than trying to fix it afterwards.
- Set white balance manually with a grey card if you have one, lock it, then shoot a short test to confirm skin tones read as skin rather than warm or cold.
A grey card reading keeps tone consistent across takes, which pays off enormously when you’re cutting clips for three different platforms later.
Camera settings that work with your lights
Once the lights are locked, the camera side is mechanical rather than creative.
- Aperture around f/2.8 to f/4: enough depth of field to keep both eyes sharp if a host leans in.
- Shutter speed at roughly double your frame rate (1/50 at 25fps, 1/60 at 30fps) to avoid strobing.
- ISO as low as your lighting allows. Noise shows up first in the shadows around the neck and hairline.
- White balance locked with the grey card, not left on auto, which drifts between cuts.
- Play back a test clip and check for clipped highlights, muddy shadows and flicker banding before you record the real thing.
Lighting the background without stealing the show
Background light and back light do different jobs. The back light separates your host from the wall. A background accent light is a stylistic choice, entirely optional, and it should never compete for attention.
- Keep any accent (an RGB tube, a small panel) noticeably dimmer than the key light on the host.
- Use brand colours sparingly through a single tube rather than washing the whole wall.
- Simple set dressing (a bookshelf, a plant, a logo) reads better than an empty wall, as long as it stays in soft focus behind the host.
A clean background pays off twice if you’re reusing the footage: once on the podcast feed, and again wherever you cut it down for shorts.
Glasses glare, flicker and other quick fixes
Most recurring lighting problems have mechanical fixes. New gear is rarely the answer.
- Glasses glare: raise the key a little higher or shift its angle a few degrees, or add a small top fill to break the reflection.
- Flicker or banding: try different shutter speeds while recording a short pan. If it persists, the fixture is the problem, not your settings.
- Harsh shadows: add diffusion, bounce the light off a wall or board, or move it closer and turn it down.
- Ambient light you can’t control: block the windows or switch the room lights off entirely and let your fixtures do all the work.
Turning off the ceiling lights once your fixtures are set is the single most common fix for an unexplained colour cast. Mixed ambient light is nearly always the culprit.
Working with the room you’ve got
Room size decides how much diffusion you need before you think about power. A small home office bounces light off close walls, which acts as free fill, but the same tight space limits how far back you can pull the key without it crowding the frame. Measure the distance from your chair to the nearest usable wall before buying anything.
A bigger room with high ceilings needs more powerful fixtures because light falls off quickly with distance, but it gives you room for a proper three-point rig with a separated back light. White walls bounce light usefully; dark walls swallow it, so you’ll need more fixtures or brighter ones.
Carpet and soft furnishings soak up ambient bounce, which changes how much fill you need from a second light. And if the room has big windows, decide early whether you’re building around that daylight or blocking it out. Half-measures cause exactly the mixed colour temperature problems covered above.
Can natural light do the job?
Light through a north-facing window is soft, even and free, and it’s a sensible way to find out whether video podcasting suits your format before spending on kit. The catch is consistency. It shifts by the hour, it disappears at dusk, and in Leeds it can go from bright to grey in the time it takes to make a brew. That’s hard to build a Tuesday-at-seven recording slot around.
Diffuse it as you would a fixture, with a sheer curtain or a diffusion panel between the host and the glass, so direct sun doesn’t throw hard moving shadows. Put the chair so the window sits at the same 45 degrees you’d use for an artificial key, not directly behind or in front of the camera.
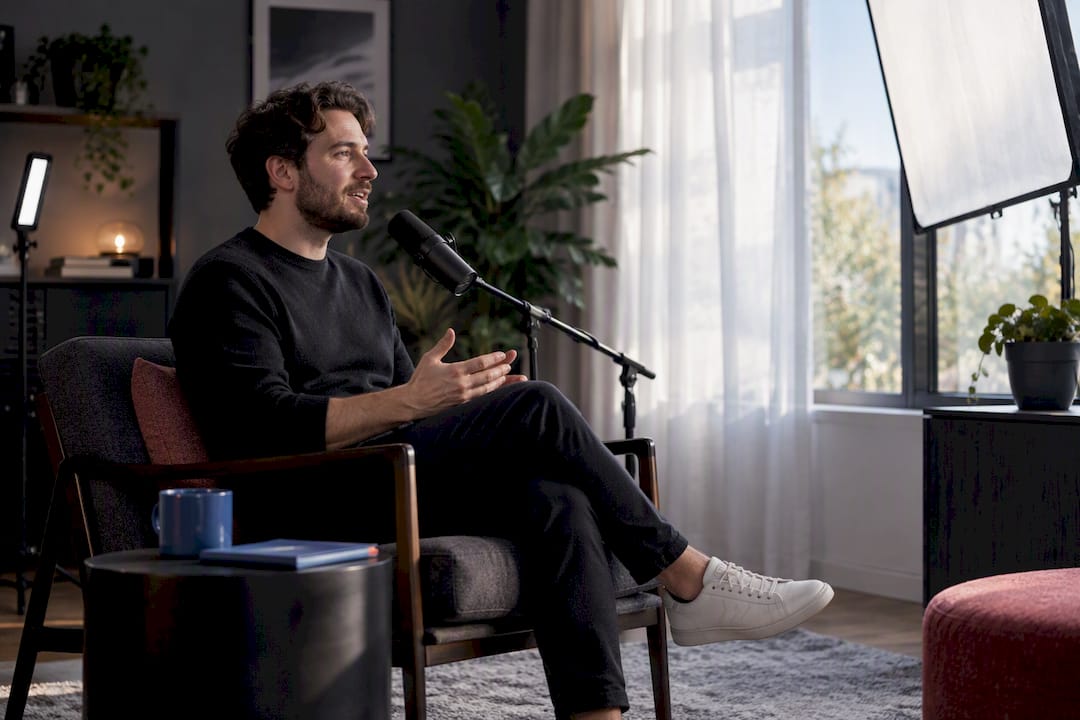
Treat the window as your key and add a small LED or reflector as fill on the shadow side, because window light alone leaves one side of the face underexposed most of the day. Once the format has proved itself, swapping the window for a diffused LED gives you the same soft quality on a schedule that doesn’t depend on the weather.
Buy your own rig, or hire a studio?
Neither is automatically better. If your format is a weekly solo show with a fixed setup, build a two-light rig and leave it permanently in place. It pays for itself within a handful of episodes. A starter kit of one panel, a softbox and a stand is modest three figures; a mid-range bi-colour pair with proper modifiers moves into the mid-hundreds; pro COB fixtures with rigging climb well beyond that.
Hiring earns its keep for anyone recording occasionally, testing a format before committing, or needing a bigger setup than their space can permanently store. It also wins for repeatable multi-camera interviews, where the lighting has to look identical across guests and sessions without re-metering every time. A studio day that bundles space, lights and setup time often costs less than a single mid-range panel, without the storage problem afterwards.
Our studio hire options run from a dry hire (space and kit, no crew) at £125, through a half day (4 hours) at £175, to a full day (8 hours) at £300, with a photographer or crew addable from £350 if you’d like an extra pair of hands behind the camera. Every booking starts with the same pre-shoot chat we have with our photography clients: what’s the brief, what does good look like, and what do we need rigged before you arrive. Our video podcast production guide covers the cameras and audio side of the same question.
Sources
- Lighting techniques for video — Canon UK
- Best photography lighting kit — Digital Camera World
- Film lighting: the ultimate guide — StudioBinder
Frequently Asked Questions
What is the best lighting setup for a podcast?
For most video podcasts, a three-point setup of key, fill and back light using continuous bi-colour LEDs gives the most consistent result. A solo host on a tighter budget can start with key and fill and add the back light later.
What is the three-point lighting rule?
A key light shapes the face, a fill light softens the shadows on the opposite side, and a back light separates the subject from the background. Each does one job, which is why the combination looks far more polished than a single bright source.
What are the best lights for a podcast studio?
Continuous bi-colour LED panels or COB fixtures with softboxes. You see exposure and colour in real time rather than guessing between takes. Godox, Aputure and Nanlite cover starter to professional budgets.
Can I light a podcast with natural light?
You can start that way. A north-facing window gives soft, even light for nothing, but it shifts by the hour and disappears at dusk, so it’s a hard thing to build a weekly schedule around.
Should I buy podcast lighting or hire a studio?
If you record weekly with a fixed setup, buy a two-point rig and leave it in place. If you record occasionally, need multiple cameras, or have nowhere to store stands and softboxes, studio hire usually works out cheaper and a lot less faff.
Where can I record a video podcast in Leeds?
Dock Street Studio is at Unit 9, 30–38 Dock Street, Leeds LS10 1JF, near Leeds Dock and a short walk from Leeds station, with parking onsite. Book online, email hello@dockstreetstudioleeds.co.uk or call 0113 4400102.
Want the lighting sorted without buying anything?
Our content, podcast and video studio has the three-point rig already up and tested, so your session starts with recording rather than setup. Bring the brief and a couple of references you like, and we’ll talk it through over a brew. Book online, email hello@dockstreetstudioleeds.co.uk, or call 0113 4400102.
Related reading
- Multi-platform streaming: a Leeds studio’s tested workflow
- Podcast studio hire in Leeds: video podcast production
- Hiring a professional studio for content creation
Written by Mark Wheelwright
Commercial photographer & studio owner, Leeds | ISO Photographic Ltd
Dock Street Studio, Unit 9, 30–38 Dock Street, Leeds LS10 1JF
18+ years’ experience | 900+ projects | 300+ five-star reviews | 1M+ shutter count
dockstreetstudioleeds.co.uk
Shot, written and built by the Dock Street team
Every guide on this blog comes from the team at Dock Street Studio — Mark behind the camera with 18+ years' experience, Nicole on styling and lighting, Beya on video and bookings and Austin keeping the site fast and findable. If you'd rather have us do it than read about it, book a session or explore our photography services in Leeds.