


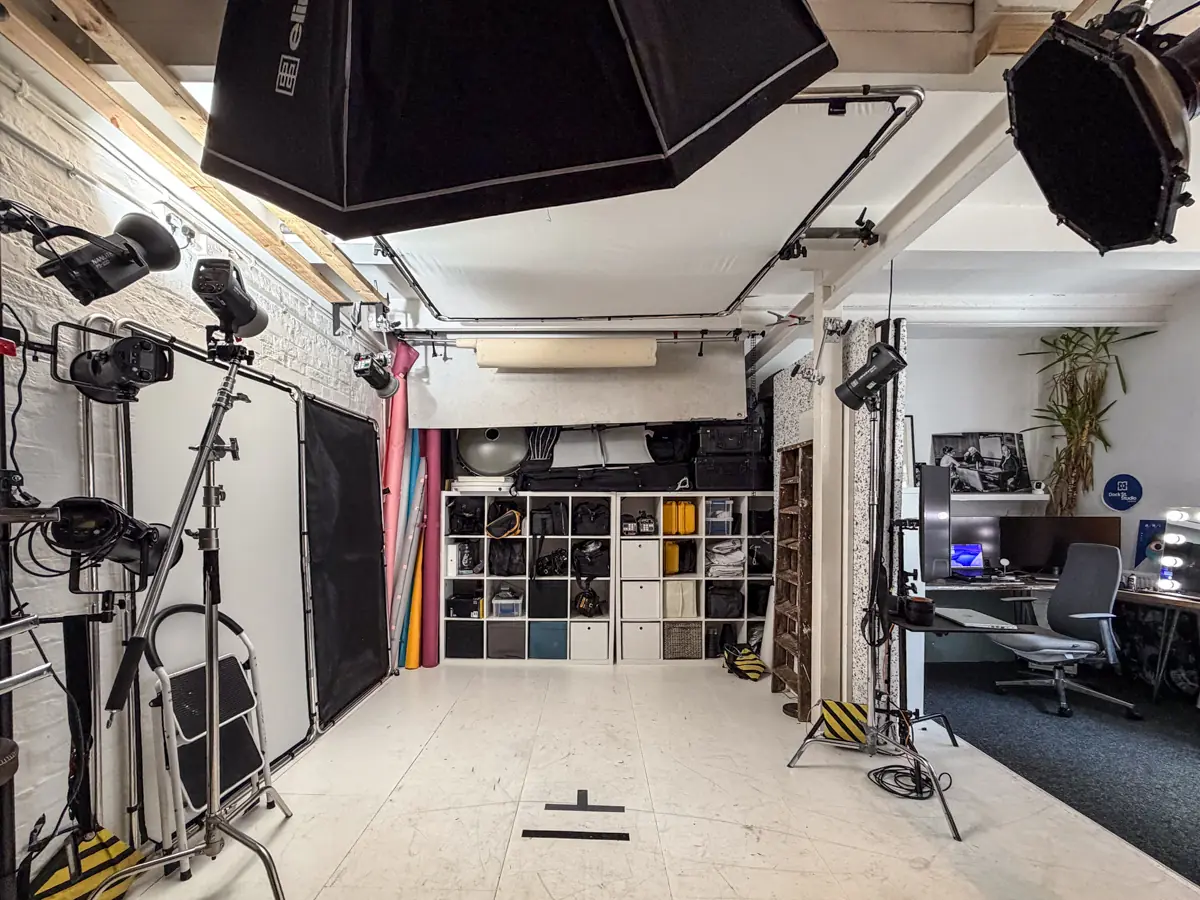
A green screen is only as good as the light you put on it. Most of the messy keys we're asked to rescue have nothing to do with the fabric and everything to do with green screen lighting: a wash that drifts half a stop across the frame, a subject stood too close to the backdrop, green creeping into hair and shoulders. The keyer ends up hunting dozens of slightly different greens instead of one, and it gives up exactly where you need it most — at the edges.
The fix isn't more kit. It's a method: light the screen evenly, light the person separately, and test the key before you commit to a long shoot. Here's the checklist we run before every green-screen booking at our Leeds studio, and the reasoning behind each step so you can adapt it to whatever space you're working in.
Why the lighting matters more than the screen
A gradient or hotspot on the screen reads to keying software as texture, not a flat plane. The result is halos, torn hair detail and a matte that flickers between frames. The second common failure is subject lighting that doesn't match the background you'll composite in later — a flatly lit presenter dropped into a moody exterior looks pasted on no matter how clean the key is.
Green is the default colour for a practical reason: most camera sensors carry more detail in the green channel than in red or blue, which gives the keyer more information to work with, as the Wikipedia entry on chroma-key explains. Blue becomes the better choice when wardrobe or props contain green — the two will key together as one colour, and no amount of lighting will save you.
Kit that earns its keep for an even green wash
Consistency across your fixtures matters more than any single light's output. Mix an old fluorescent tube with a daylight-balanced LED panel and you introduce colour shifts across the screen that the keyer reads as texture, so match fixture type and colour temperature throughout the rig — the advice the chromakey buying guide from Scan leads with, and the one we'd underline twice.
Bi-colour LED panels with a high CRI rating are the easiest fixtures to match across a small rig. Diffused fresnels work too, though they need careful flagging to keep spill off the subject and the surrounding walls, and fluorescent tubes still turn up in budget rigs — fine, provided every tube is the same age and colour temperature. Softboxes, diffusion frames and grids knock down hotspots, and a waveform monitor (or at minimum your camera's histogram) lets you check for a flat response across the frame rather than guessing from the viewfinder — a habit worth building early if you're planning broadcast livestreams, where there's no second take.
One tip from experience: buy or hire one extra stop of diffusion beyond what you think you need. It's cheaper than reshooting half a day of footage with a patchy key.
Rigging the wash, step by step
Hang the screen fully taut, free of wrinkles, then set two to four wash lights at matching angles and heights either side of it. Angle each light at roughly 45 degrees to the screen so the beams overlap in the centre rather than creating two separate hotspots.
Pull the lights back and widen the beams with diffusion until readings across the frame sit within about half a stop of each other — the tolerance BOLD Cine's lighting lesson recommends for a workable key. Then check the waveform across the width of the screen: a flat line means you're close; a slope or dip means a light is too close, too hard, or poorly overlapped with its neighbour. If you find a hotspot, resist the dimmer. Move the light further back and add diffusion first — distance softens a beam far more evenly than dimming does.
Lighting the subject so the edges stay clean
Treat the person as a completely separate lighting job. Key and fill sit forward of the screen, angled so their spill lands on the subject rather than bouncing onto the fabric behind — the same key, fill and rim thinking we use for studio lighting for headshots, just with a stricter rule about where the light is allowed to fall.
Add a rim or backlight behind and above the subject, harder and more directional than the key, to carve out hair and shoulder edges. Steer people away from shiny jewellery, watches and glossy fabrics, which pick up and reflect green — the same reflection problem we flag in our notes on packshot lighting. And match the subject's lighting direction and contrast to whatever background you're compositing in, so the final shot feels like one scene rather than two. Light the subject first, then dial in the green wash around them; work the other way round and you'll end up rebalancing both.
Exposure that flatters one skin tone can flatten another, so judge key and fill levels on the individual in front of the camera rather than a fixed recipe. Darker skin tones often want a touch more fill to hold shadow detail; lighter skin tones clip sooner if the key runs hot. Trust the zebras or the histogram, not the monitor alone — and remember spill shows more on some skin tones than others, which makes the rim light and the distance guidance below matter even more.
Spill, distance and camera settings
Distance is the simplest lever you have. Pull the subject roughly 2.5 to 4 metres from the screen when space allows and spill has far less chance to wrap around the edges — particularly for full-body or moving shots, per BOLD Cine's guidance. In tighter spaces, 2 to 3 metres is workable for head-and-shoulders setups, though you'll lean harder on the rim light and on spill removal in post.
- Full-body or moving shots: 2.5–4 metres (8–12 ft) from the screen where space allows.
- Head-and-shoulders setups: 2–3 metres is workable — lean harder on the rim light and spill removal in post.
Negative fill, black flags and careful side lighting absorb bounced green before it reaches the lens — far easier than rescuing footage where green has crept into hair and skin from the start.
Capture settings decide how much information your keyer gets. Shoot 10-bit with 4:2:2 chroma sampling where your camera allows it; heavily compressed 8-bit 4:2:0 footage shows up as noisy, ragged edges the moment you pull the key. Expose for the subject first, then confirm the green reads bright and saturated without clipping. Turn off in-camera sharpening (it exaggerates edge contrast in ways that confuse the keyer), keep ISO as low as your lighting allows, and pick a shutter speed that controls motion blur without dragging trails through fast movement.
Shadows, wrinkles and tired screens
Every fold in a creased screen throws a small shadow the keyer reads as a colour change. Keep fabric screens taut and steam them before use; store them rolled, not folded, to avoid permanent crease lines. Painted walls and rigid panels avoid the problem entirely, which is why studios running regular green-screen sessions tend to prefer them — no setup, no creasing, no drama between bookings. Whatever the material, keep it clean: every scuff and stain becomes a visible patch once lit, and a screen that has faded unevenly will light unevenly no matter how carefully you rig.
Shadows usually mean the subject is too close to the screen or a light is set at too steep an angle. Moving the subject forward removes most cast shadows on its own; where a stubborn patch persists, add a dedicated wash light angled to fill that spot rather than raising every light and blowing out areas that were already even. Check the corners and the floor junction carefully — they're the spots crews miss, and exactly where a keyer leaves a dark fringe.
Test the key before you roll
Never wait until the edit to find out the key doesn't hold. Set the lights, lock off the camera, and record five to ten seconds of the subject moving naturally. Drop a basic keyer over the clip and pull the key as you would in the final edit, then inspect the edges around hair, shoulders and fine detail for green fringing, torn edges or a flickering matte.
If you spot problems, check the usual culprits in order: uneven wash, not enough subject-to-screen distance, or compression that's too aggressive. Then reshoot the test. Post work can refine a decent key, but it rarely saves a bad one — the same reason we shoot stills tethered into Capture One, where clients see every frame live. Finding the problem on set costs five minutes; finding it in the edit costs the day.
A final pass in the grade still earns its keep. Spill suppression works best as a light touch — over-suppress and the subject goes flat and desaturated. Colour matching to the new background is a separate pass: adjust white balance, contrast and shadow colour on the subject layer until the light direction and warmth feel consistent with the plate, and consider a light wrap, blending a thin edge of background colour back onto the silhouette the way real light bounces between a subject and its surroundings.
Hire a studio or build your own rig?
Honestly, it depends. If you shoot green screen every week, a painted wall and a matched rig of your own will pay for themselves. If you need a clean key a few times a year, building and troubleshooting a rig is time and kit you may never use again — hiring is the lower-risk option, and you're paying for a wash that's already been tested rather than hoping yours behaves on the day.
Our studio hire in central Leeds is built around exactly that problem: the lighting, the green screen and the space are set up and tested before you arrive, so you're not chasing hotspots on the clock. Dry hire gives you the space and kit to run your own crew; half-day and full-day bookings suit anything from a single test key to a full shoot day; and our content studio option adds staffed production support for green-screen, podcast and livestream work. We confirm the brief, the intended background and wardrobe before a single light goes up, and we pull a test key before the session starts properly — so you see a clean result before we start shooting, not after.
Frequently Asked Questions
What type of lighting is best for a green screen?
Soft, matched LED panels or diffused fluorescents give the most even wash, because keeping fixture type and colour temperature consistent across the rig avoids the colour shifts that confuse a keyer. Light the person separately with their own key, fill and rim rather than asking the screen lights to do both jobs.
How do you light a green screen evenly?
Set two to four wash lights at matching angles and heights either side of the screen so the beams overlap in the middle, then check a waveform monitor or histogram for a flat reading across the frame. If you see a slope or a hotspot, pull the light back and add diffusion before you reach for the dimmer.
What are the disadvantages of using a green screen?
Uneven lighting, wrinkled fabric and green spill on skin or clothing all produce a messy key that needs heavy post-production work to rescue. And if your subject's wardrobe contains green, you'll need a blue screen instead — the keyer can't tell a green jumper from the background.
What is the best lighting setup for green screen footage?
Two wash lights on the screen as a minimum, kept completely separate from a dedicated key, fill and rim on the subject. Record a short test clip and pull a rough key on set before the main shoot — it's the only reliable way to know the setup is working.
Can I hire a green screen studio in Leeds?
Yes — we're in central Leeds (LS10), a short walk from Leeds train station with onsite parking. The green screen and matched lighting are set up and tested before you arrive, and you can book a half day or full day online.
Book a green screen shoot in Leeds
If you'd rather spend the day shooting than troubleshooting a wash, bring us the brief and we'll talk it through properly — the space, the kit and a tested key will be waiting when you arrive. Book online, email mark@isophotographic.org, or call 0113 4400102.
Sources
- Lighting for Green Screen Chroma Key | BOLD University | BOLD Cine
- Light & chromakey buyers guide | Scan
Written by Mark Wheelwright
Commercial photographer & studio owner, Leeds | ISO Photographic Ltd
Dock Street Studio, Unit 9, 30–38 Dock Street, Leeds LS10 1JF
18+ years' experience | 900+ projects | 300+ five-star reviews | 1M+ shutter count
dockstreetstudioleeds.co.uk
Shot, written and built by the Dock Street team
Every guide on this blog comes from the team at Dock Street Studio — Mark behind the camera with 18+ years' experience, Nicole on styling and lighting, Beya on video and bookings and Austin keeping the site fast and findable. If you'd rather have us do it than read about it, book a session or explore our photography services in Leeds.