


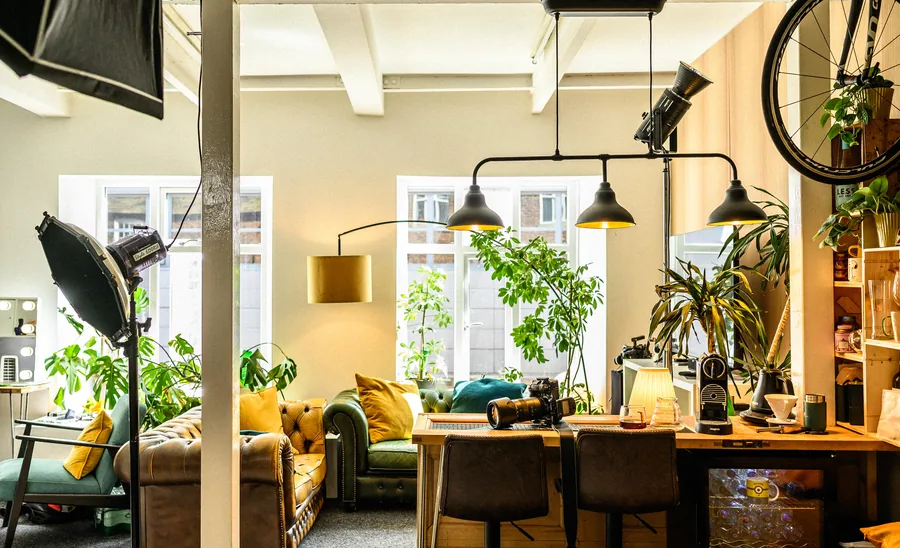
A packshot looks like the simplest photograph a business will ever commission. One product, one clean background, no model, no location, no weather to negotiate. That simplicity is exactly why the lighting has nowhere to hide.
The best lighting for packshots is rarely dramatic. It shows shape, finish, colour and the details a customer needs to see, then repeats itself faithfully for the next ninety items in the range. Most of the packshot problems we are asked to fix at our Leeds studio come down to the same three things: hard shadows, backgrounds that photograph grey, and colour that drifts from one product to the next.
Decide what the packshot has to do first
Before anyone switches a light on, work out where the image is going to live. A white-background listing photo for an online shop needs to be even and repeatable above everything else. A bottle for a premium drinks brand can carry more shape and contrast and still sit on white. Jewellery, glassware and anything chrome is a reflection problem before it is a lighting problem. Clothing and textured packaging need enough light from the side to show what the material actually feels like in the hand.
There is no single setup that suits every product. Size, surface and the level of consistency you need all pull the answer in different directions. A short run of handmade candles can be photographed with one light and a reflector. A catalogue of 200 lines needs a setup that can stay put all day, with tape on the floor and camera settings nobody touches after lunch.
It also helps to be clear that a packshot and a lifestyle image are two different jobs. A packshot answers practical questions: what is it, what colour is it, how big is it, what is the finish? A lifestyle shot sets a mood and puts the product in a life. We have written before about where each of those earns its keep, and the short version is that asking one photograph to do both usually leaves you with a weak version of each.
Best lighting for packshots: start big and soft
For the majority of products, a large softbox is the right place to begin. The bigger the light source looks from the product's point of view, the softer the shadow edges and the gentler the reflections. That is what gives packaging a clean, considered look without flattening it into a diagram.
Where to put the main light
We normally set the main softbox above the product and slightly to one side. That gives a little modelling, so the item has some weight to it and does not look pasted onto the background. A reflector or a weaker second source on the opposite side then lifts the shadow enough to read the detail, without wiping out the shape you have just built.
Broad and controlled beats bright. A bare flash head throws hard highlights and sharp-edged shadows that are a nuisance to clean up afterwards. It has its uses when you want a crisp, graphic look on purpose. For everyday listing photography it is the harder road, and it rarely looks better for the trouble.
Light tents, and where they stop helping
For small items a light tent is a lower-risk option. It wraps the product in soft light and copes well with mildly shiny surfaces. The trade-off is that everything comes out slightly flat, because light arriving from every direction leaves no shadow to describe the shape. We usually stand a piece of black card just outside the frame to put an edge back into the product.
Flash or continuous light?
Both will give you professional results, so the choice is about how you want to work rather than which is better. Studio flash is powerful, consistent in colour and quick through a long list. It keeps the ISO low, which matters when a file will later be cropped hard for a banner or sent to print. Set it once and the hundredth frame matches the first.
Continuous LED lets you see the result before you press the shutter, which is reassuring if you are photographing a handful of items yourself. It also means stills and short video clips can come out of the same setup without rebuilding the set halfway through the day.
The catch is power. Once you put a large diffuser in front of a modest LED you are into slower shutter speeds or higher ISO, and the shoot slows with it. In our studio we use flash for volume packshot work, and continuous light where video is part of the brief or the product needs a very precise adjustment you want to watch happen.
Getting a white background genuinely white
The most common mistake we see is a single light pointed at the product, with the assumption that a white sweep will come out white. To your eye it looks fine. In the file it is pale grey. Brighten the whole image to fix it and you wash the product out along with the background.
Light the product and the background separately. Leave enough distance between the two that the product's own shadow is not landing on the backdrop, then aim one or two lights at the background alone and bring it up until it reads clean, without letting it spill round the edges of the product and eat into the outline.
For some shops a near-white or very light grey background is more useful than clipped pure white, because it keeps the small contact shadow under the product and stops it floating in space. Marketplaces often insist on pure white for the main image, so check the platform specification before the shoot rather than after it. We go through that detail in our guide to Amazon's UK image requirements.
If the range is broad, test the background exposure with the lightest and the darkest item first. A matt black box and a white ceramic mug will not behave the same way under identical light. Small adjustments between products are normal and expected. What you are chasing is a consistent finished set, not identical numbers on the back of the camera.
With glossy products, you are lighting the reflections
On anything shiny, the camera records reflections as much as it records the object. A black coffee machine, a glass bottle or a foil pouch will show you the window, the edge of the softbox and whoever happens to be standing nearby in a light shirt. At that point packshot lighting stops being about adding light and starts being about deciding where the reflections fall.
Look at the product before you photograph it. Move the softbox around by hand and watch the surface change. A bright reflection running down an edge can define a dark object beautifully. The same reflection sitting across a logo makes the product unreadable, and no amount of retouching puts that right convincingly.
Black and white foam boards do most of this work. White adds a clean highlight or opens up a shadow. Black lays a dark line down the side of a clear bottle or a chrome kettle and gives it an outline it would otherwise lose against a white background. Moving a card five centimetres is almost always quicker than trying to rescue a confused reflection later.
Glass gets flags and diffused light from the side rather than anything fired straight at the front. The label has to stay legible while the glass needs highlight and shadow to show its form. It is the part of a product day we would always rather not rush.
Keep the colour honest
Packshots are commercial pictures. If someone orders a navy jumper and what arrives is visibly not the navy on the website, the photograph has failed however nice it looks. Honest colour starts with consistent light and a fixed white balance, not with the edit.
Avoid mixing window light with flash or LED unless you are controlling it deliberately. The colour temperatures differ, and you end up with one side of a product warmer than the other for no good reason. Yorkshire light does not help here. A bright morning in Leeds can look ideal and then change completely in the time it takes to make a brew. For repeatable work we block the windows and rely on the studio lights.
Shoot a grey card or a colour target at the start of the session, especially where the exact colour is the thing being sold. It gives us a dependable reference in the edit instead of trusting a laptop screen that nobody has calibrated. Editing should confirm the colour of the product, not invent it.
Three lights, and how to adjust them
For packaging, cosmetics, food and most retail items, three lights is a sensible starting point. A large softbox as the key, a reflector or weaker fill on the opposite side, and a separate light on the background. Set the product forward of the sweep so the background light does not wrap round the edges of it.
Take a frame and look at it properly at full size. Label, corners, texture, any metal. Then change one thing. Shadow too heavy, add fill. Product looking flat, take fill away or move the key further round to the side. Grey patch behind it, adjust the background light rather than turning everything up.
That sounds slower and it is faster. Changing power, exposure and light position all at once leaves you with a better picture and no idea which change did it, which is no use at all when the next product needs the same treatment. It is one of the reasons we shoot tethered into Capture One. A crooked label or an awkward reflection is obvious on a large screen and almost invisible on the back of a camera, and it is far cheaper to catch it while the set is still standing.
The small things that spoil good packshots
Clean every product before it goes on set. Dust, fingerprints and stray fibres are painfully obvious at full resolution, and gloss packaging shows marks that only appear once the lights are on. Microfibre cloths, cotton gloves, tape and a soft brush live within arm's reach for the whole day.
Use a tripod. It holds camera height, framing and focus point steady while products come and go, and that steadiness is most of what consistency actually means. Agree the crop and the angle before you start the range as well. Straight on, a slight three-quarter view and a flat overhead all say different things about a product. Pick the one that suits your website layout and hold it for every item, even the awkward ones.
When a studio is worth it, and when it is not
If you are photographing a dozen simple items once a year, a north-facing window, a sheet of white card and some patience will get you a long way. We would rather say that than sell you a day you do not need.
Where a studio starts to pay for itself is volume, awkward surfaces, tight deadlines, or a range that has to match work shot six months ago. Our product photography days in Leeds are set up for that kind of repeatability, and you are welcome to sit with us at the screen while we work rather than waiting a week to see results.
Frequently Asked Questions
How many lights do I need for packshots?
Two will cover a lot of ground: one large soft key and one on the background. A third gives you fill, which helps with dark or heavily textured products. More lights than that usually means more problems to solve rather than better pictures.
Can I get good packshots with continuous LED lighting?
Yes, particularly for smaller runs and when you want video from the same setup. Allow for the drop in power once you add diffusion, and turn the room lights off so the colour stays consistent across the range.
Why does my white background photograph grey?
Because it is only being lit by whatever light spills off the product. Give the background its own light and its own exposure, and keep the product far enough forward that its shadow does not land on the sweep.
Do I need pure white for marketplace listings?
Most marketplaces require it for the main image and their specifications vary, so check the current rules before the shoot. It is worth keeping a second version with a natural contact shadow for your own website.
How long does a packshot shoot take?
Once the set is built and signed off, simple products move quickly. The first item always takes the longest, because that is when lighting, crop and colour get agreed. We will talk it through properly before quoting, so the day is costed on your actual range rather than a guess.
Where is the studio and how do I book?
Dock Street Studio is at Unit 9, 30–38 Dock Street, Leeds LS10 1JF, in central Leeds near Leeds Dock and a short walk from Leeds train station, with parking onsite. Book online, email hello@dockstreetstudioleeds.co.uk, or call 0113 4400102.
Book your product photography in Leeds
Bring us the awkward one first: the shiny thing, the black thing, the item nobody has managed to photograph well yet. We will build the light around that and keep the rest of the range matching it. Book online, email hello@dockstreetstudioleeds.co.uk, or call 0113 4400102.
Written by Mark Wheelwright
Commercial photographer & studio owner, Leeds | ISO Photographic Ltd
Dock Street Studio, Unit 9, 30–38 Dock Street, Leeds LS10 1JF
18 years in business | 900+ projects | 300+ five-star reviews | 1M+ shutter count
dockstreetstudioleeds.co.uk
Shot, written and built by the Dock Street team
Every guide on this blog comes from the team at Dock Street Studio — Mark behind the camera with 18+ years' experience, Nicole on styling and lighting, Beya on video and bookings and Austin keeping the site fast and findable. If you'd rather have us do it than read about it, book a session or explore our photography services in Leeds.