


Studio lighting for headshots comes down to one large, soft key light close to the face, a fill of some kind, and a rim or background light only once you need real separation. Softness comes from the size of the modifier and how close it sits, not from power: 100 to 200Ws of studio flash, or a speedlite at quarter power, is usually more than enough. Build up from one light to clamshell to a three-light rig as the brief and the room allow, and the three setups below will cover most headshot work you will ever be asked for.
I have been building and rebuilding these setups at the studio for a long time, for corporate rolls, actors and one-off portraits. This is the order I would learn them in, the numbers I actually start from, and the mistakes that cost people reshoots.
The short version
- A big, soft modifier placed close to the face does more for a headshot than a more powerful light ever will.
- One key light and a reflector produce professional results, and they are the fastest setup to move between rooms.
- Clamshell flatters skin and softens shadow; loop lighting adds shape with a small nose shadow. Different jobs, both two lights.
- Background and hair lights are about consistency across a batch, not drama. Meter a white seamless one to one and a half stops over the subject.
- Repeatability comes from marked positions and a fixed order of work, not from owning more kit.
One-light headshot setup: when a reflector beats a second light
Most photographers overcomplicate their first setup. A single key light and a reflector will give you a professional headshot, and it is worth mastering before you buy anything else. It is also the quickest to break down between bookings, which matters when you are shooting on location or in a hired room rather than a permanent studio.
Here is the sequence that works reliably:
- Put a softbox at roughly 45° to the subject's face, raised a little above eye level and angled down. A 24 to 36in box is the sweet spot for mobile work; Fstoppers recommends that size range because it stays large enough for soft light while still fitting in a car boot.
- Bring it closer than feels sensible. Distance is the enemy of softness: the nearer the source, the larger it looks relative to the face, and the gentler the shadow edges.
- Set a reflector at about mid-chest height, angled up, to bounce light back into the shadow side and add a second catchlight. A sheet of white foamboard or a small speedlite on low power both do the same job.
- Start the camera at ISO 100 to 200, 1/200s and f/5.6 to f/8. Flash at around 1/8 to 1/4 power, then shoot a test frame before you commit to the sequence.
- Check the histogram and the catchlights on that frame, then adjust power or distance rather than aperture, which would change your depth of field across the whole shoot.
Small rooms punish careless setups. Feather the softbox (aim it slightly past the subject rather than straight at them) to soften the light further without moving it, and shift the key a touch off-axis if the brows are throwing dark shadows into the eye sockets. Kill whatever ambient light you can, especially mixed-colour ceiling fittings, because they fight the flash's white balance and show up as a cast in the shadows.
Pro tip: if the room is under 10ft deep, drop to a 24in softbox and bring it in close rather than forcing a 36in box to work from the back wall. A smaller box used close beats a bigger box crammed into a corner.
Two-light setups: clamshell and loop lighting compared
Once you are comfortable with one light, the next step is a second source, and it splits into two different jobs: filling shadow (clamshell) or sculpting the face with directional light (loop). Both are two-light setups. They solve different problems and suit different briefs.
Clamshell stacks a key above the face, angled down, with a fill light or reflector below, angled up. For most professional headshot sessions a two-light clamshell is treated as the industry standard, because it flatters skin and takes the hard shadow out from under the chin and nose almost automatically. The trick is the ratio, not just the placement:
- Set the key first and expose for it. Ignore the fill entirely at this stage.
- Bring the fill in at roughly one to one and a half stops under the key. Any dimmer and it does nothing; any brighter and you flatten the face and lose the shape clamshell is meant to give you.
- Look at the shadow under the chin. It should be softened, not gone. If it has vanished, pull the fill back a touch.
Loop lighting takes a different route: one key light offset 20° to 45° from the camera axis and raised slightly above eye level, creating a small, defined shadow that loops down from the nose. SLR Lounge singles out loop as the most universally flattering pattern for corporate headshots, and it is the one I default to when the brief is vague.
With either, a kicker or rim light adds separation from hair and shoulders once the base is sorted. Keep it low, roughly one to two stops under the key, and flag it so it cannot spill straight into the lens.
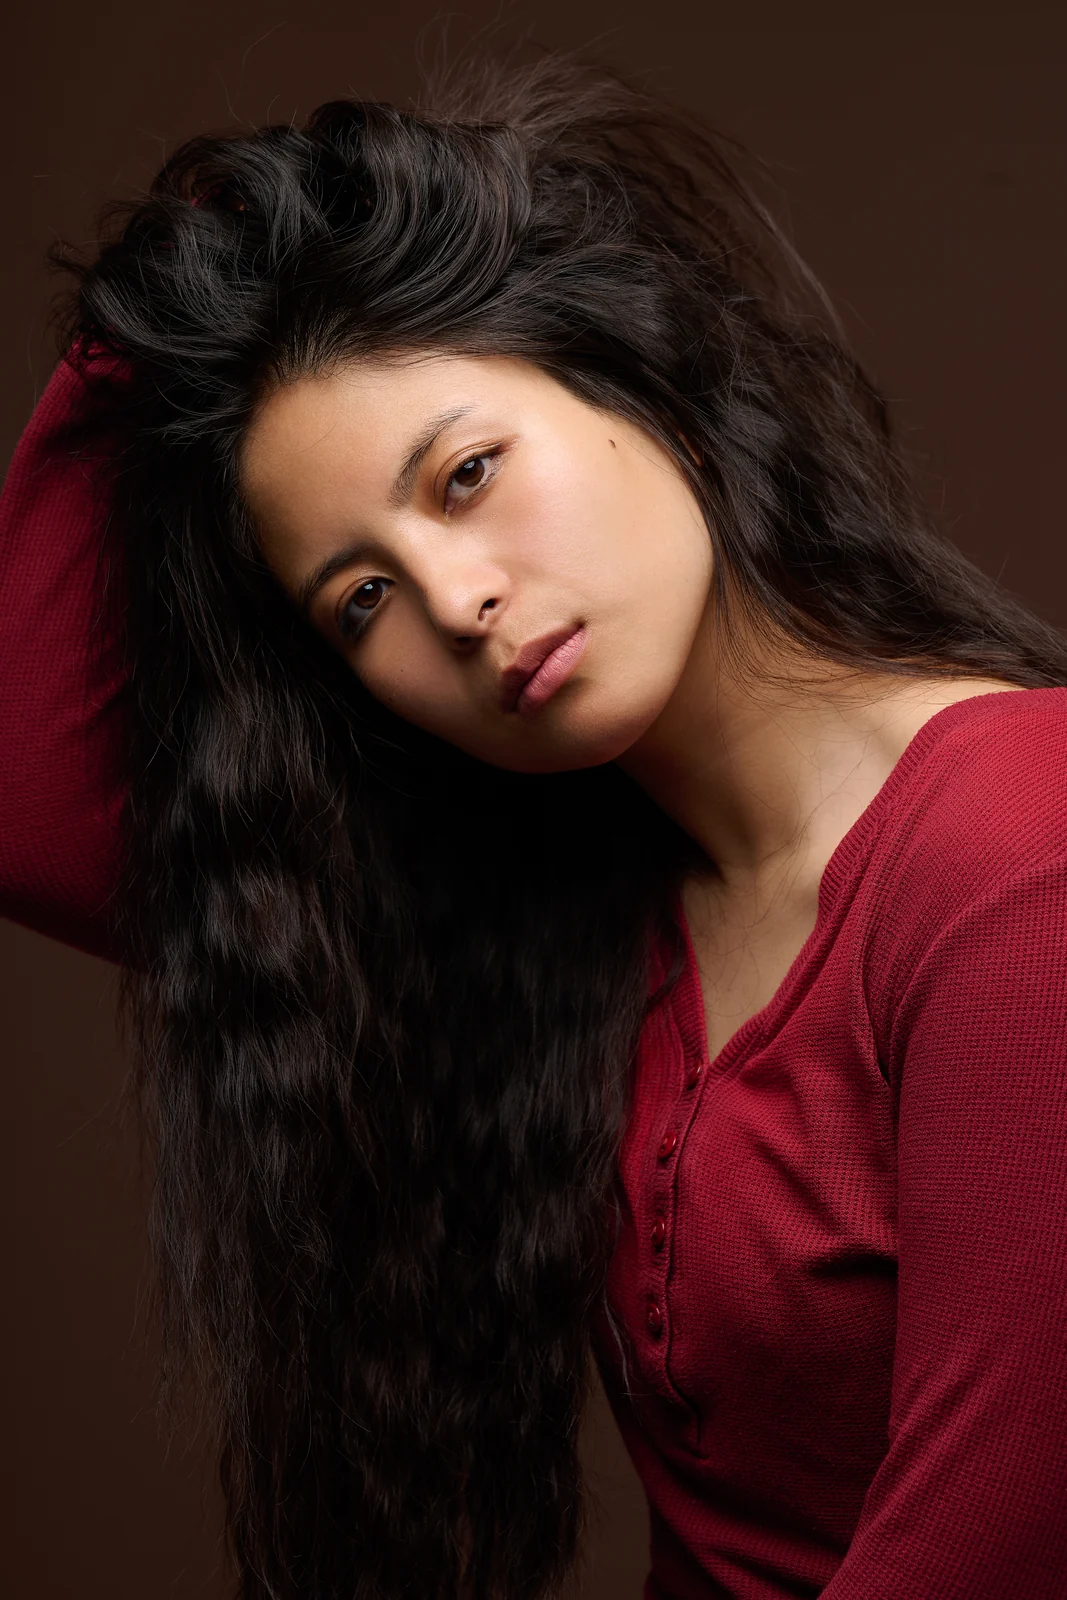
Pro tip: build every two-light setup in the same order: key first, expose for it, add fill until the shadow softens without disappearing, then decide whether a rim light is actually needed. Skipping to three lights before you have judged the first two almost always ends up muddier.
Three- and four-light setups for backgrounds and hair separation
Adding a background or hair light is less about drama and more about consistency. Once you are shooting several people back to back for a corporate roll, or dark hair against a dark backdrop, a third and fourth light stop being optional and become the difference between a clean set and a fiddly one.
- Meter a white seamless one to one and a half stops brighter than the subject, so it reads as white rather than grey.
- Cross two background lights from opposite sides rather than one straight on. It evens the coverage and avoids a hotspot in the middle of the backdrop.
- Put the hair or rim light behind the subject on the opposite side from the key, so it sculpts the edge of the head and shoulders away from the background.
- Grid or snoot the accent lights so they stay tight and do not wash across the face or your background exposure.
- Reach for the extra lights for high-volume sessions where every frame has to match, for dark hair on dark backdrops, or for a bright high-key look.
Four lights is a production decision, not a quality upgrade on its own. If the brief is one actor's headshot rather than fifty staff photos that need to sit side by side, two lights done properly will usually beat four done in a hurry.
Which lighting pattern suits your brief?
A lighting pattern is really a question of where the shadow falls on the face, and each one sets a mood before anyone has chosen an outfit or a backdrop. PhotoWorkout's breakdown of the classic patterns is a useful decision matrix. In short:
- Loop — key 20–45° off axis, a little above eye level. Small nose shadow, gently directional. Corporate and professional headshots.
- Butterfly — key straight in front and high. Symmetrical shadow under the nose. Beauty and glamour.
- Clamshell — key above, fill below, both facing the subject. Near shadowless, very even skin. Beauty, corporate, video.
- Rembrandt — key 45° off axis, higher than eye level. Triangle of light on the shadow cheek. Character and editorial portraits.
- Split — key 90° to the side. Half the face lit, half in shadow. Moody, editorial, some actor work.
Loop is the safest default for corporate work because it flatters without editorialising the subject. Clamshell and butterfly suit beauty briefs where evenness matters more than shape. Rembrandt and split belong to character and editorial work, where a stronger statement is the point.
The good news is you rarely need to rebuild the set to change pattern. Moving one key from straight ahead (butterfly) to 45° off axis (Rembrandt) changes the whole mood of a shoot in under a minute, without touching fill or background lights.
Gear, modifiers and practical kit choices
The biggest lever on softness is not the flash's output, it is how large the modifier looks from where the subject is standing. Increasing apparent source size, by using a bigger modifier or moving it closer, is the single most important factor in soft light, and that principle should drive every kit decision below before wattage comes into it.
- For mobile or location headshots, a 24 to 36in softbox balances portability against softness.
- For studio beauty work, a 70 to 135cm softbox or umbrella lets you work closer to the face without the edge of the modifier creeping into frame.
- Grids on any modifier narrow the spread, which is exactly what you want on accent and rim lights.
- Speedlites are a perfectly valid choice, not a compromise, as long as they are in a properly sized softbox with a reliable trigger rather than fired bare.
- Studio strobes in the 100 to 200Ws range are usually enough for studio headshots, because the modifiers sit close to the subject rather than lighting a room.
- A boom arm earns its keep the first time you want a light directly overhead without a stand leg in the background.
- Black foamboard flags control spill far more cheaply than another light, and belong in every kit bag whatever the budget.
Our equipment guide for Leeds studio hire lists the modifiers and stands we keep on hand for exactly this reason. If you are weighing flash against continuous LED panels for your next purchase, our piece on flash versus continuous lighting covers where each one wins.
Pro tip: before buying a second light, buy a bigger softbox for the one you already own. Most headshot lighting problems are solved by source size, not by adding another strobe.
Camera settings and a repeatable session checklist
Lens choice shapes flattery as much as lighting does. An 85 to 135mm equivalent on full frame keeps you at a comfortable working distance and avoids the slight distortion a wider lens puts on a close-up face.
- ISO 100 to 200, shutter at 1/200s or your camera's sync speed, aperture f/5.6 to f/8 for head-and-shoulders framing with both eyes sharp.
- Meter for the highlight on the forehead, or shoot a test frame and read the histogram, adjusting flash power rather than shutter speed.
- Check the ratios by eye on the test frame: the shadow side should read clearly darker than the key side, with detail still visible in it.
- Confirm catchlights in both eyes before the real sequence starts. Missing catchlights are the fastest way a headshot reads as flat.
- Run the session in order: brief the subject on pose and expression, put them on the marked floor spot, test frame and adjust, then shoot the sequence with a quick review every few frames to catch drift.
Around 12 by 20ft of clear floor gives you room to swing lights and step back for framing without cramping the set. It is a useful rule of thumb when you are planning an on-site session in a client's meeting room.
How we keep headshot sessions repeatable at Dock Street Studio
Consistency across a headshot session comes from planning the lighting before the client walks in, not from adjusting it on the fly once they arrive. Every headshot booking here starts with a conversation about the brief, corporate, actor or brand, because that decides the pattern and setup before a light is switched on.
- We mark and standardise light positions in the studio, so a corporate batch shot across several sessions still matches when the images sit side by side on a website or staff directory.
- We shoot tethered, so exposure, catchlights and framing get checked on a full screen between frames rather than squinted at on a camera back. Problems get caught before they become a reshoot.
- Retouched images are usually delivered within 48 hours, so nobody is left waiting once the shoot is done.
Our headshots at Dock Street Studio piece shows some of this in practice, and the session guide for our Leeds studio walks through the briefing in more detail.
Where should lights sit relative to the face?
Height and angle change the shape of a face more than any other single adjustment. A key raised above eye level and angled down creates a natural, flattering shadow under the cheekbone and jaw. Drop that same light to eye level or below and the shadows start climbing upward, which looks wrong on almost every face.
As a starting point, keep the key 15° to 30° above the subject's eyeline and angle it down by a similar amount. That is what produces the classic loop's small nose shadow without straying into the deeper triangle of Rembrandt.
Horizontal position controls how much of the face falls into shadow. A key close to the camera axis lights the face almost flat, which suits corporate work where legibility matters more than shape. Move the same light further round the subject and the shadow side grows, adding dimension for editorial or character work. Push it past about 45° and you risk losing the shadow side entirely unless the fill is doing real work.
Fill and rim lights follow the same logic in reverse. The fill sits lower and closer to the camera axis to soften shadow without competing with the key. A rim or hair light sits high and behind the subject, often just out of frame, so it grazes the edge of the hair and shoulder rather than lighting the face at all.
%2520(1).webp)
Getting the most from reflectors and bounce cards
A reflector is not a consolation prize for people without a second light. Used properly it does a job a second flash often cannot: it fills shadow with a softer, more diffused quality, because it bounces the key light's own softness back rather than introducing a second, separately hard source.
Position matters more than size. Held too low, a reflector fills under the chin but leaves the eye sockets dark. Held at mid-chest height and angled up toward the face, it lifts shadow evenly across the lower half of the face and, crucially, adds a second, softer catchlight that gives the eyes life.
Silver bounces harder and adds a slightly cooler, punchier fill, useful in dim rooms where you need real lift. White is gentler and more forgiving on skin, and the safer default when the goal is a natural corporate look rather than an editorial one. Gold adds warmth that suits outdoor-style beauty work but pushes skin orange under studio flash, so use it sparingly indoors.
The biggest reflector mistake is treating it as fixed once positioned. Move it as the subject turns their head, because the angle that filled shadow perfectly at a three-quarter pose will often do nothing once they face the camera square on.
Common headshot lighting mistakes and how to fix them
Most lighting problems trace back to a handful of repeatable causes, and the fix is usually simpler than the symptom suggests.
Harsh, defined shadows on the face. The modifier is too small or too far away. Move it closer or size up rather than adding another light to compensate.
Dark shadows under the brows or in the eye sockets. The key is too high or too far off axis. Lower it slightly or reduce the horizontal angle until the shadow softens.
Flat, shapeless lighting. The fill is too close to the key's power and has erased the shadow. Pull it back or drop it a stop.
Hot spots or uneven exposure on a white background. The background lights are not crossed, or only one light is covering the seamless. Cross two from opposite sides and re-meter.
Colour cast in the shadows. Ambient light, usually mixed-colour ceiling fittings, is bleeding in. Kill it where you can or gel the flash to match.
Flare from a rim or kicker. The light is pointing too close to the lens axis. Flag it, or angle it further behind the subject so only the edge of the beam reaches into frame.
Adjusting your setup for different skin tones and face shapes
Exposure and ratio need small adjustments depending on who is in front of you, and treating every face identically is where a lot of otherwise well-built setups fall short.
For deeper skin tones, a slightly brighter key and a fill closer to the key's power (rather than the usual one to one and a half stops under) holds detail and stops the shadow side crushing to black. Metering for the forehead highlight still applies, but check the shadow side on the test frame specifically, since that is where detail goes first if the fill is set too conservatively.
For lighter skin tones, watch for blown highlights on the forehead and cheekbones under a key that is too bright or too close. Pulling the softbox back slightly, or dropping power by a third of a stop, usually sorts it without touching the aperture.
Face shape changes where the key sits horizontally. Rounder faces often benefit from a more angled key, moving toward Rembrandt, to bring shadow and definition into the jaw. Narrower or more angular faces usually suit a flatter, more frontal loop or clamshell, since they already have natural definition and extra shadow reads as severe rather than flattering.
Glasses and facial hair both interact with angle rather than power. Raise the key slightly and adjust the angle so reflections do not bounce straight back into the lens from glasses, and add a touch more fill on darker facial hair so it does not lose all its detail into the shadow. If you are the one being photographed rather than the one lighting it, our post on what to wear for headshots covers the wardrobe side of the same problem.
Colour temperature and white balance for consistent skin tones
Every light source in the room has its own colour temperature, and mixing them is the fastest way to end up with skin that shifts subtly from frame to frame, or worse, from session to session across a corporate batch.
Studio strobes and most speedlites are built to a daylight balance, typically around 5,500K. Set the camera to match, either as a fixed daylight preset or with a custom reading from a grey card, and skin stays consistent shot to shot. The risk comes from the room: tungsten desk lamps, fluorescent overheads and window light all sit at different temperatures, and any of them mixing with the flash shows up as a cast, usually orange or green, most obviously in the shadows where the flash is weakest.
The fix is simple in principle if not always in practice. Kill the ambient where you can: close the blinds, switch off the room lights, let the flash be the only source. Where that is not possible, such as a client's office, gel the flash to match the ambient rather than trying to correct it afterwards, which rarely gives an even result across a whole shadow range.
For any multi-session corporate roll, shoot a grey card at the start of every session and use it to set a custom white balance, so images taken weeks apart still match when they sit side by side.
What actually separates a good headshot setup from a great one
The advice most photographers hear first, buy more lights, is backwards. Source size and distance do more work than an extra strobe ever will, and a single properly sized softbox moved closer to the face outperforms a poorly placed three-light rig nearly every time. That is not a contrarian take so much as what the physics of light rewards, yet it is still the bit most beginners skip on their way to buying gear they do not need.
The bigger gap in practice is not lighting theory at all. It is repeatability. Plenty of photographers can build one lovely setup on a good day. Fewer can rebuild it, to the same ratios, three weeks later for the client's second batch of staff photos. That is where marked floor positions, a fixed order of work and treating the pre-shoot brief as seriously as the lighting start to matter more than which modifier you bought.
If there is one thing to take from this piece above all the detail, it is discipline in that order: key first, expose for it, then fill, then decide whether you need anything else at all.
— Mark
Frequently asked questions
What kind of lighting is best for headshots?
A large, soft key light such as a 24 to 36in softbox, paired with a reflector or a second fill light, gives the most consistently flattering results. Loop is the most widely recommended pattern for corporate work.
What is the 3-light rule?
There is no single fixed "3-light rule", but the common three-light approach uses a key, a fill or rim for separation, and a background light to keep a white seamless clean and evenly lit.
What is a good two-light setup for headshots?
Clamshell: a key above the face angled down, and a fill below angled up at around one to one and a half stops under the key. It is treated as the industry standard for professional headshots.
What is the best colour to wear for a headshot?
Solid mid-tones that avoid pure white or pure black photograph most reliably. White can blow out under flash and black can lose all its detail in shadow, though the right choice depends on skin tone and the brief.
Can I hire the studio and use these setups myself?
Yes. Studio hire includes the Elinchrom and Godox heads, modifiers, backdrops and stands, from £125 for two hours, £175 for a half day or £300 for a full day.
Where is the studio and how do I book?
Dock Street Studio, Unit 9, 30–38 Dock Street, Leeds LS10 1JF, a short walk from Leeds train station with lift access and parking on site. Book online, email hello@dockstreetstudioleeds.co.uk, or call 0113 4400102.
Book a professional headshot session at Dock Street Studio
Reading through the setups above is useful groundwork. Replicating them session after session, with the right modifiers, the right room and a workflow already tested on hundreds of headshots, is a different job. We hand you a fully equipped Leeds studio and a photographer who has already solved the positioning, ratio and background questions in this piece, so you get consistent, professional results without building or troubleshooting a lighting rig yourself.
Headshot sessions start from £95 for a LinkedIn Express, with retouched images usually back within 48 hours. For a full staff roll that has to match across dozens of people, or a brand shoot alongside the headshots, our commercial photography service runs from £450 for a half day. Book online, get in touch, email hello@dockstreetstudioleeds.co.uk, or call 0113 4400102.
Sources
- How to shoot corporate headshots | Photographytalk
- How to set basic effective headshot lighting | Fstoppers
- Common key light patterns | SLR Lounge
- What is soft light in photography | Narrative blog
Recommended
- Studio Headshots or Outdoors?
- Professional Headshot Session Guide
- Flash vs Continuous Lighting
- Photo Studio Equipment Guide
About the author
Mark Wheelwright
Commercial photographer & studio owner | ISO Photographic Ltd, Leeds
Dock Street Studio, Unit 9, 30–38 Dock Street, Leeds LS10 1JF
Mark has 18+ years' experience photographing brands and businesses across Leeds and West Yorkshire, with 900+ projects delivered. He runs Dock Street Studio, working with clients including Clear Channel, Habitat, Kirkstall Brewery and Paystrax.
900+ projects | 300+ five-star reviews | 1M+ shutter count
dockstreetstudioleeds.co.uk
Shot, written and built by the Dock Street team
Every guide on this blog comes from the team at Dock Street Studio — Mark behind the camera with 18+ years' experience, Nicole on styling and lighting, Beya on video and bookings and Austin keeping the site fast and findable. If you'd rather have us do it than read about it, book a session or explore our photography services in Leeds.