


Most self-tapes are won or lost before anyone presses record. Film landscape on a tripod at eye level, light your face from the front with a soft source, get clean audio, keep the background plain, and follow the casting instructions to the letter. That combination covers nearly everything a casting director needs to judge your performance fairly. Equity’s self-tape guidance and Spotlight’s technical advice both point the same way: get the basics right, then stop fiddling.
This guide walks through a self-tape setup that works in a spare room — kit, light, sound, framing and files — and is honest about the point where a bedroom stops being enough and a couple of hours of studio hire becomes the lower-risk option. We see plenty of actors at our Leeds studio for exactly that reason, so we know where home setups tend to come unstuck.
The kit you actually need
A modern smartphone is genuinely enough for most self-tapes. Spotlight says as much, and we’d agree: the skill is in the lighting, framing and following instructions, not in owning expensive kit. A DSLR or mirrorless camera only earns its keep if you already know it well — a fumbled settings menu under deadline pressure wastes more time than it saves.
Before you press record, run a short kit check:
- A tripod or phone clamp, so the frame never wobbles.
- A stable surface for your light and any reflector.
- A charged spare battery, or a lead plugged into the wall.
- Enough free storage for several takes in HD.
- A stand — or a stack of books — to get your light to the right height.
For settings, record MP4 using the H.264 codec at HD resolution, at 25fps. That frame rate keeps you in step with UK mains lighting and avoids the flicker that catches a casting director’s eye for the wrong reason. A few minutes of HD footage rarely runs past a few hundred megabytes, so storage is seldom the limit. Time and patience are.
One habit worth keeping: record thirty seconds of test footage and play it back on a laptop before your real take. Phone screens flatter footage that looks murky on anything larger.
Lighting and sound: get these right first
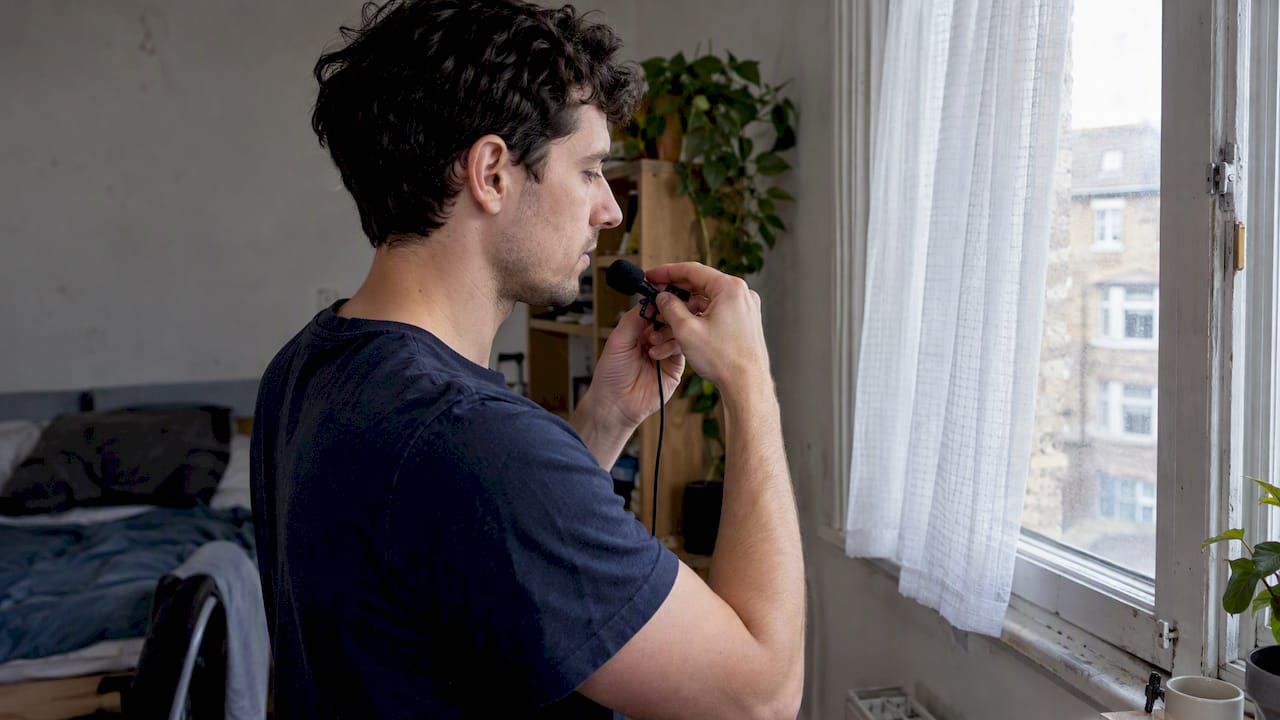
Daylight is free and usually flattering. Face a window directly rather than sitting with it behind you, and hang a net curtain or a thin white sheet across it to soften harsh sun — though in Yorkshire the light can change in the time it takes to make a coffee, so don’t be precious about waiting for perfect conditions. Spotlight’s lighting guidance recommends close mic placement or an external microphone over a built-in one, which tends to pick up room echo.
For artificial light, a softbox or an LED panel bounced off a wall beats a ring light, which gives a flat, slightly clinical look and a telltale circular reflection in the eyes. If your footage looks grainy, the fix is almost always more light, not a better camera — Spotlight’s advice is the same, and it specifically flags 25fps as the UK fix for banding under artificial light.
A quick pre-record routine saves re-shooting later:
- Record a slate and play it straight back through headphones.
- Listen for hums — fridges, boilers, radiators — and switch them off where you can.
- Watch the footage on the largest screen available, not just your phone.
A lavalier or small shotgun mic clipped just out of frame will outperform almost any phone’s internal microphone, for not much money.
Framing, eyeline and your slate
Framing errors are the easiest mistakes to avoid and the most common reason a tape gets skipped. Spotlight is specific: film in landscape, frame a mid-close-up from your chest to the top of your head, set the camera at eye level, and never use digital zoom, which degrades the picture badly.
- Set your eyeline just beside the lens, not into it, unless the instructions ask for a straight-to-camera read.
- Keep your reader close to the camera so your eyeline reads naturally rather than drifting off to one side.
- If a scene needs multiple eyelines, agree a simple left–right system with your reader beforehand so cuts between characters stay consistent.
- Record your slate first — name, role, agent if you have one — then move into the scene without resetting the frame.
Consistency between the slate and the scene matters more than either looking perfect on its own.
Backgrounds, wardrobe and props
Casting directors are judging your face and your choices, so the background should disappear. A plain grey backdrop is the safest bet, and standing roughly a metre off the wall avoids the hard shadow that falls behind you under a single light. Our guide to backgrounds that work for actor headshots covers how colour and texture read on camera, and the same principles apply here.
- A bedsheet or a roll of fabric pinned flat works as a cheap backdrop — steam the creases out first.
- Avoid bright white, which blows out under most lighting, and busy patterns, which pull focus from your face.
- Wear neutral, role-appropriate clothing. Skip logos, loud prints and shiny fabrics that catch the light oddly.
- Keep props to the minimum the casting brief actually asks for.
Files, labelling and sending your tape
Getting the performance right only matters if the file arrives the way casting asked for it.
- Export as MP4 with the H.264 codec at HD resolution, matching the frame rate you recorded at.
- Name the file the way casting teams expect — Name_Role_Project — so it’s instantly identifiable in a folder of dozens of submissions.
- Slate on camera with your name and role before the scene, and add a brief full-length ident only if the brief asks for one.
- Send via WeTransfer, Dropbox or a private Vimeo link rather than email, which often compresses attachments and strips picture quality.
- Play the file back on a laptop or TV before sending, and check the filename is right once it lands.
Common mistakes, and a pre-send checklist
Most rejected tapes fail for reasons that have nothing to do with acting ability:
- Filming in portrait instead of landscape.
- Poor or muffled audio that makes the viewer strain to listen.
- Backlighting that turns your face into a silhouette.
- A cluttered or overly bright background.
- Sending the wrong file format, or an unplayable file.
- Mislabelling the file so it gets lost among other submissions.
Before you send, run a final check: camera steady and level, audio clean, framing correct, slate recorded, filename right, transfer method confirmed. Backstage’s reporting on what casting directors prioritise is clear that performance comes first — technical quality only matters when it gets in the way of seeing or hearing you. Choose the take where you told the truth, not the one where the lighting was marginally better.
When DIY is fine — and when a studio earns its keep
A spare room with a lamp and a bedsheet genuinely works for most self-tapes. We’d rather you knew that than felt you had to book a studio for every submission. Some situations, though, push past what a bedroom setup can reasonably manage:
- Taping young performers, where consistent lighting and a calm environment matter more than usual.
- Complex recalls asking for specific technical specs, multiple angles or uniform lighting across several actors.
- Regular submissions, where a consistent, repeatable look across tapes genuinely helps your reel.
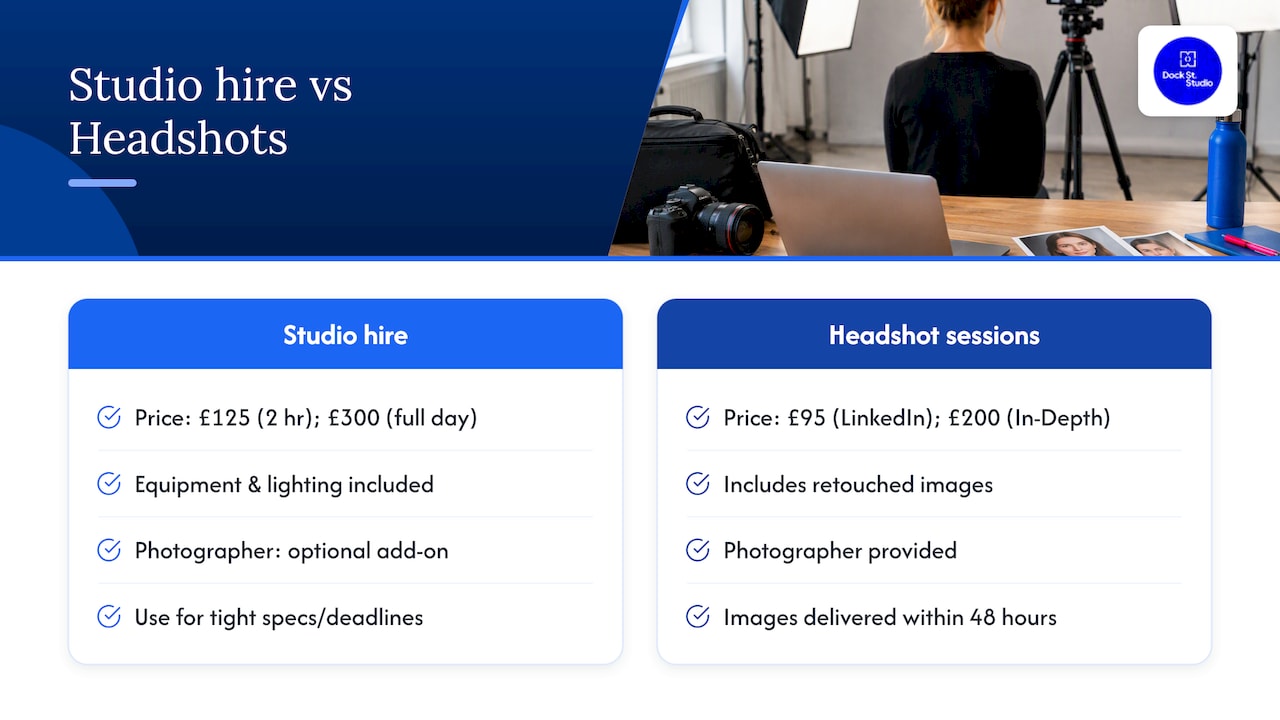
We offer dry studio hire from £125 for two hours for actors who want a controlled space and their own equipment, up to a full day at £300 — with a photographer added if you want one. A practical hybrid works well too: build a lighting and framing template in one session, photograph the setup, then recreate it at home for speed on future submissions. Our piece on finding the right space for self-tapes weighs up home versus studio in more detail.
Pairing a tape session with a fresh set of actor headshots keeps your submissions consistent — sessions start at £95, with retouched images delivered within 48 hours, so there’s no waiting around before your next audition round. And if you’re building audition confidence more broadly, Ocean Theatre Co. runs structured performing arts training for younger performers in Berkshire that pairs well with regular taping.
Frequently Asked Questions
How do I set up my self-tape?
Put your phone on a tripod at eye level in landscape orientation, light your face from the front with a soft source, and record somewhere quiet against a plain background. Frame a mid-close-up from your chest to the top of your head, as Spotlight recommends, and check your audio before you record the scene proper.
What are the most common self-tape mistakes?
Filming in portrait rather than landscape, muffled or echoey audio, backlighting that turns your face into a silhouette, and sending the wrong file format. Mislabelled files cause real problems too — casting teams review dozens of tapes and rely on clear filenames to keep track of them.
How should I label my self-tape?
Use the naming convention casting teams expect, such as Name_Role_Project, so your file is instantly identifiable in a folder of submissions. Slate your name and role on camera as well — a filename alone isn’t reliable if the file gets renamed in transfer.
Should I film self-tapes horizontal or vertical?
Horizontal — landscape orientation — unless the casting brief specifically asks for something else. Spotlight’s guidance is explicit on this, and landscape matches how casting teams view footage on their monitors.
Where is Dock Street Studio and how do I book?
We’re at Unit 9, 30–38 Dock Street, Leeds LS10 1JF — near Leeds Dock, a short walk from Leeds train station, with onsite parking. You can book online, email us or call, and we’re happy to talk a setup through properly before you commit to anything.
Book your next self-tape in Leeds
If a recall has landed with a tight deadline, or the brief asks for more than your spare room can deliver, the studio takes that pressure off — lighting sorted, equipment included, and a calm space to work in. Book online, email mark@isophotographic.org, or call 0113 4400102.
Sources
- Self-tape & Zoom auditions guidance — Equity
- How to self-tape — Spotlight
- Casting directors and self-tapes — Backstage
Written by Mark Wheelwright
Commercial photographer & studio owner, Leeds | ISO Photographic Ltd
Dock Street Studio, Unit 9, 30–38 Dock Street, Leeds LS10 1JF
18+ years' experience | 900+ projects | 300+ five-star reviews | 1M+ shutter count
dockstreetstudioleeds.co.uk
Shot, written and built by the Dock Street team
Every guide on this blog comes from the team at Dock Street Studio — Mark behind the camera with 18+ years' experience, Nicole on styling and lighting, Beya on video and bookings and Austin keeping the site fast and findable. If you'd rather have us do it than read about it, book a session or explore our photography services in Leeds.