


The most useful setup for a video podcast is a primary eye-level medium shot as your anchor, a close-up for emotional beats or ad reads, and a secondary side or over-the-shoulder camera to catch reactions. For most beginners, that means one main camera at eye level framing you from the chest up, plus a phone or webcam angled in from the side, with a soft key light in front. It is simple, forgiving, and gives an editor enough material to cut a scene that feels alive.
TL;DR:
- Using a primary eye-level medium shot with a side or over-the-shoulder camera creates a simple, versatile setup that enhances engagement.
- Matching camera height and shot size across angles ensures visual consistency and prevents jarring transitions during editing or live switching.
- Keeping the key light at 45 degrees to the subject avoids harsh shadows and enhances facial engagement through catchlights.
- A basic setup with a smartphone, webcam, and a mirrorless or DSLR camera covers most production needs while allowing crop flexibility with 4K footage.
- Consistent framing, lighting, and preparing a shot list support a professional, cohesive podcast appearance that aligns with storytelling and emotional impact.
Table of Contents
- Common camera angles and shot sizes and what each conveys
- Choosing angles by format: solo, interview, co-host and remote setups
- Camera placement and framing rules with quick on-set checks
- Equipment and practical setups from phones to mirrorless cameras
- Lighting and composition: how angle choice affects light and the subject
- Short UK consent and performers’ rights checklist
- Practitioner checklist and Dock Street Studio tips
- Techniques for maintaining consistent angle and framing to ensure visual continuity
- How to switch between multiple camera angles during editing or live streaming
- Impact of camera angles on audience engagement and storytelling in podcasts
- Advanced tips for using camera angles to convey mood or emphasize audio content
- The starter setup I would tell any new podcaster to try
- Bring your podcast angles to a proper studio
- Sources
- FAQ
Common camera angles and shot sizes and what each conveys
Every angle you choose tells the viewer something, whether you mean it to or not. Eye-level shots feel conversational and honest, which is why they work as the backbone of almost every talking-head format. BBC Bitesize’s guide to camera angles explains that eye-level framing conveys immediacy, while a low angle can make a subject seem more dominant and a high angle tends to shrink someone’s presence. A bird’s eye view is useful for establishing a room or a table full of guests but says nothing useful about a single speaker. A worm’s eye angle, shot from the floor upward, is dramatic and almost never appropriate for a podcast unless you are deliberately going for something theatrical.
Shot size matters as much as angle. A close-up draws attention to emotion and works well for punchlines or sponsor reads. A medium shot, framing from roughly the chest up, is the natural home for dialogue because it shows enough body language without crowding the face. A wide shot earns its place when you need to show more than one person interacting.
- Eye-level medium: your default for hosts, guests, and most conversational segments.
- Close-up: reserved for emphasis, reactions, or ad reads.
- Wide or high angle: useful for context and multi-person shots, not for solo talking heads.
- Headroom and lead room: too much space above the head looks empty, too little feels cramped, and leaving space in the direction someone is looking or facing keeps the frame balanced.
Choosing angles by format: solo, interview, co-host and remote setups
The angles you need depend entirely on how many people are in the room and where they are.
- Solo shows work best with a single eye-level medium as the primary camera, with an optional close-up secondary for moments you want to punch in during editing.
- Two-person interviews usually call for two matched medium shots, one on each speaker, or a single two-shot supplemented by individual close cameras for reaction cutaways. Keep both cameras at the same height so eyelines match when you cut between them.
- Roundtables and multi-host shows benefit from a wide primary camera that captures everyone, with tighter cameras added on individual hosts for cutaways. Microphone placement often forces a slightly higher camera angle to keep mic stands out of frame, which is a fair trade-off.
- Remote or video-call guests need consistent framing so their eyeline matches yours: ask them to raise their laptop or webcam to eye level rather than looking down. Virtual backgrounds are best used sparingly since they can distract from the conversation, and a separate reaction camera on your side adds cutaway material that a screen recording alone cannot give you.
Camera placement and framing rules with quick on-set checks
Distance and height decide whether a shot reads as intimate, neutral, or awkward. A close-up generally sits somewhere around half a metre to a metre from the subject, a medium shot around one to two metres, and a wide shot further back depending on how much of the room you want to include. Camera height should sit at eye level for most talking segments: raise it and you flatter less, lower it and you risk an unintentional power dynamic that BBC Bitesize notes comes with low and high camera angles.
Before you hit record properly, run through a short checklist:
- Check headroom, leaving a small gap above the head without excessive empty space.
- Confirm lead room, so a speaker looking or gesturing to one side has space to look into.
- Make sure shoulders sit evenly in frame, without one side cut off.
- Stabilise the camera on a tripod or clamp rather than a stack of books.
Pro Tip: Record ten seconds before your first real take and watch it back immediately, checking for eye contact with the lens, harsh shadows, and any clutter creeping into the background.
Equipment and practical setups from phones to mirrorless cameras
You do not need a full camera kit to get multiple usable angles. A phone mounted on a small tripod makes a genuinely solid secondary or reaction camera, and apps built for this purpose, including Apple’s own Continuity Camera feature, make it straightforward to bring a phone into your setup. A webcam is the easiest option for remote calls, though it is worth remembering that most webcams compress footage more heavily and offer a narrower field of view than a dedicated camera. A mirrorless or DSLR camera still delivers the strongest image quality and low-light performance, which makes it the natural choice for your primary angle.
- Phone: cheap, flexible, and good enough for a secondary or reaction shot.
- Webcam: simplest for remote guests, but watch for compression and a tight field of view.
- Mirrorless or DSLR: best image quality, ideal as your main camera.
- Tripods, clamps, and small booms: the cheapest way to add a new angle without buying another camera body.
Filming in 4K on your primary camera lets you crop into the footage during editing to create a tighter reframed shot from a single static angle, providing greater flexibility, according to PremiumBeat’s guide to using 4K footage, though it does mean more storage space and longer processing time. It is most worth doing when you cannot afford to cover a session with a second physical camera.
Lighting and composition: how angle choice affects light and the subject
Angle and light are tied together more closely than most beginners expect. A standard setup places a key light at roughly 45 degrees to the subject, with a softer fill on the opposite side and, ideally, a backlight to separate the subject from the background. BBC’s filming guidance recommends this 45-degree positioning specifically because it produces natural results and reduces harsh shadows. Move your camera lower than the light source and you risk unflattering shadows under the chin; move it higher and you can lose the catchlight in the eyes that makes a subject look alert and present.
- Keep the key light roughly level with or slightly above eye height to avoid nose and chin shadows.
- Watch for catchlights: a small reflection in the eyes reads as engagement.
- Use a plain or softly blurred background, or reposition the subject a metre or two forward to separate them from clutter behind.
Pro Tip: If your background looks busy on camera, try moving your subject further from the wall rather than reaching for a virtual background, since natural depth blur usually looks more convincing.
Short UK consent and performers’ rights checklist
Anyone recording guests for publication in the UK should be aware that performers’ rights under the Copyright, Designs and Patents Act 1988 mean recording or broadcasting someone’s performance without their consent can be an infringement. In practice, that means getting a recorded verbal agreement before you start, using a written release for anything intended for commercial use, and keeping copies of that release alongside your episode files. If you are recording a live performance or using third-party copyrighted material, it is worth getting proper legal advice rather than guessing.
Practitioner checklist and Dock Street Studio tips
A few habits separate a smooth shoot from a frustrating one, and they cost nothing beyond a bit of discipline before you press record.
- Label every camera (A, B, C) before you start, so nobody scrambles mid-edit to work out which file came from where.
- Run a short framing test on each camera and confirm which one is your master audio-visual track.
- Agree on a simple verbal or hand cue for reaction shots, so your editor knows when to cut away.
- Keep angles and framing consistent episode to episode, since viewers notice when a show suddenly looks different.
- Shoot a little extra B-roll, such as hands on a keyboard or a wide establishing shot, to give an editor breathing room for pacing.
These are the same checks we run through with clients before any video podcast shoot at Dock Street Studio, where a short pre-shoot pass on framing and lighting tends to save far more time in the edit than it costs on the day.
Techniques for maintaining consistent angle and framing to ensure visual continuity
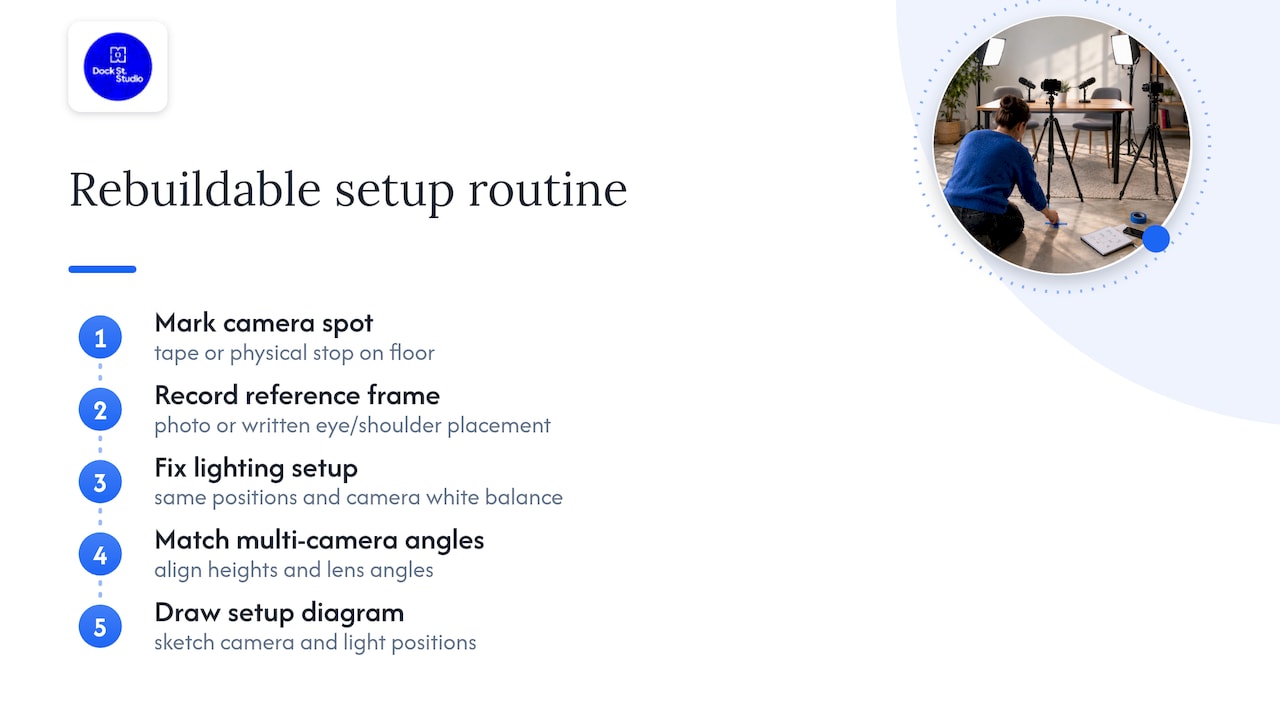
Consistency is what makes a show feel professional rather than improvised, and it comes down to a handful of repeatable habits rather than expensive kit. Mark your camera height and distance with tape on the floor or a small physical stop, so that if you move a tripod between episodes you can return it to the same spot. Keep a written or photographed reference of your ideal frame, including where the eyes and shoulders sit, and check new setups against it before recording.
Lighting consistency matters just as much as camera position. If your key light shifts even slightly between episodes, viewers who watch back to back will notice the change in mood even if they cannot say why. Using the same lighting positions each time, along with the same white balance setting on your camera, keeps the look uniform.
When you work with more than one camera, matching height and lens angle across all of them avoids a jarring jump when you cut between shots. A close-up shot from a camera above eye level and a medium shot from one at eye level will feel disconnected even if both are technically well framed. Building a simple setup diagram, even a rough sketch showing where each camera and light sits, means anyone helping you film, or you yourself weeks later, can rebuild the same look without starting from scratch. This is particularly useful for shows recorded in different rooms or locations, where lighting conditions vary but the framing should not.
How to switch between multiple camera angles during editing or live streaming
Cutting between angles well is less about fancy switching hardware and more about having a clear plan before you start, similar to best practices recommended by professional videographers in NYC for event productions. In post-production editing, the simplest approach is to sync your cameras on a shared audio track, usually the podcast microphone feed, and then cut to whichever angle best matches the moment: a close-up for a strong point, a wide shot for context, a reaction shot when a guest responds.
For creators editing after the fact, most video editing software allows you to place synced clips on separate tracks and switch between them with a simple cut or a short cross dissolve. Avoid switching too often, since constant cuts can feel restless rather than dynamic; a change every 20 to 40 seconds, timed to a natural beat in conversation, usually reads as intentional rather than distracting.
Live streaming adds a layer of real-time decision-making. Software built for multi-camera switching lets you assign each source to a numbered key, so you can cut live as the conversation moves, though this requires someone dedicated to watching the feed and switching, since a host cannot reliably do both at once. Whichever method you use, cutting on a natural pause or the start of a new sentence, rather than mid-word, keeps transitions feeling clean. Keeping a consistent order to your angles, always returning to the same master shot between cutaways, also helps viewers orient themselves without thinking about it.
Impact of camera angles on audience engagement and storytelling in podcasts
The angle a viewer sees shapes how much attention and trust they give a moment, even if they never consciously register why. A static, eye-level shot held for too long can start to feel flat, which is one reason mixing in cutaways and reaction shots keeps a long conversation watchable. BBC’s filming guidance notes that varying framing and shot sizes supports storytelling and that filming extra B-roll gives an editor room to maintain pacing rather than relying on a single static frame for the whole runtime.
Reaction shots in particular do a lot of quiet work. A well-timed cutaway to a guest’s raised eyebrow or a host’s laugh gives the audience a second layer of information beyond the words being spoken, and it mimics the visual grammar viewers already know from film and television. Wide shots, used sparingly, can reset a scene and remind viewers of the setting, which matters more for roundtable formats than for solo shows.
None of this means more angles automatically means more engagement. A show that cuts constantly between five cameras with no clear reason can feel busier without feeling better. The goal is to use each angle with intent: a close-up because a moment deserves emphasis, a wide shot because the group dynamic matters, a reaction shot because someone’s response adds something the audio alone would miss.
Advanced tips for using camera angles to convey mood or emphasize audio content
Once the basics are solid, camera angle becomes a tool for supporting whatever the audio is doing rather than simply documenting it. A slow push in, whether done live with a lens or achieved by cropping 4K footage in post, can underline a serious or emotional moment without a single word of narration explaining it. Conversely, cutting to a wider shot during a lighter, more chaotic exchange between hosts can mirror the looser energy of the conversation.
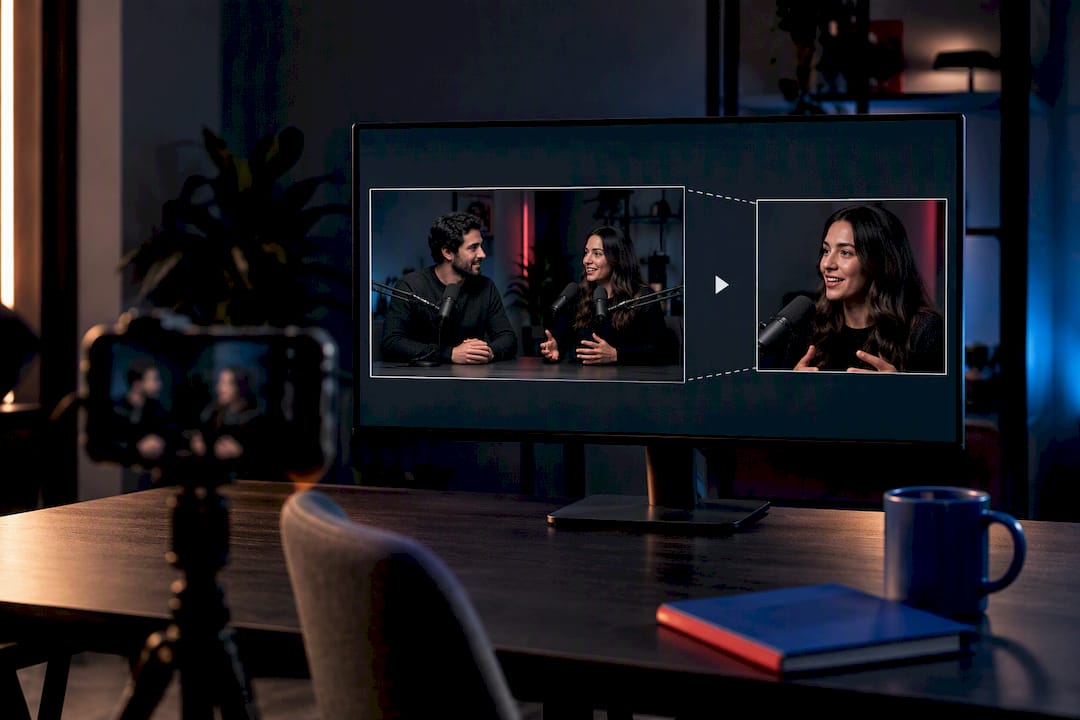
Shadows and low light can suit a more reflective or serious segment, provided the subject’s eyes remain visible, while brighter, flatter lighting tends to suit upbeat or comedic material. Shifting a secondary camera slightly off-axis, rather than keeping every angle perfectly square to the subject, can add a touch of visual interest to long interview segments without distracting from the conversation. Holding on a close-up a beat longer than usual after a guest makes a striking point gives the audience a moment to sit with it, in the same way a pause in speech would.
None of these techniques need expensive gear. A single extra camera, used with intent rather than left running on autopilot, does more for a show’s feel than a rack of matching equipment used without a plan. The audio is still the heart of most podcasts, and the strongest camera work is the kind that supports what listeners are already hearing rather than competing with it.
The starter setup I would tell any new podcaster to try
Start with one eye-level medium camera, a phone propped up to the side for reaction shots, and a single soft key light in front of you. It is cheap, forgiving, and gives an editor enough to work with. Once that feels comfortable, consider a 4K primary camera so you can crop in during editing without buying a third body.
— Mark
Bring your podcast angles to a proper studio
DIY setups get you a long way, but there is a ceiling to what a phone, a tripod, and a spare room can achieve, particularly once you are juggling three or four angles, matching lighting across cameras, and trying to keep a guest comfortable at the same time. Dock Street Studio’s Content, Podcast & Video Studio hire gives you a dedicated space with lighting and camera positions already sorted, so the angles you have just learned about are simple to set up rather than a constant battle with a cluttered spare room. Our approach starts with a clear pre-shoot plan for your episode, covering camera placement, lighting, and shot list, so the session runs to time and you walk away with footage that is ready to edit rather than salvage. If you would rather hire the space and the equipment than build it from scratch, take a look at our studio hire rates and get in touch to check availability for your next episode.
Sources
- Camera angles - Camera - GCSE Moving Image Arts (CCEA) Revision - BBC Bitesize
- Using 4K footage in a 1080p sequence (PremiumBeat)
- Legislation
FAQ
What are 10 common camera angles?
Common camera angles include eye-level, low angle, high angle, bird’s eye, worm’s eye, over-the-shoulder, two-shot, point-of-view, Dutch angle, and close-up framing, each used for a different effect on how the viewer perceives the subject. For podcasts specifically, eye-level, medium, close-up, wide, and over-the-shoulder cover almost everything you will need.
What are the 12 basic camera angles?
Definitions vary slightly by source, but a common list builds on the ten common angles above by adding variations such as extreme close-up and extreme wide shot, which are less about angle and more about shot size. For a podcast, focusing on eye-level, low, high, wide, and close-up framing covers the angles that matter in practice.
What are the four camera angles?
A simplified version of camera angle theory often narrows things to eye-level, low angle, high angle, and bird’s eye view, since these four cover most of the emotional effects a viewer will notice. BBC Bitesize’s explanation uses these four as the core categories, with other angles treated as variations or combinations.
How much does a podcast with 5,000 listeners make?
This is not publicly documented in a way that gives a reliable figure, since podcast earnings depend heavily on sponsorship rates, format, and niche rather than listener count alone. It is best treated as a separate question from camera setup, which affects production quality rather than revenue directly.
Do I need consent to record a podcast guest in the UK?
Yes, under UK performers’ rights law, you should obtain a guest’s consent before recording and again before publishing their performance. A simple recorded verbal agreement covers most casual podcast recordings, while a written release is safer for anything intended for wider commercial use.
Recommended
Shot, written and built by the Dock Street team
Every guide on this blog comes from the team at Dock Street Studio — Mark behind the camera with 18+ years' experience, Nicole on styling and lighting, Beya on video and bookings and Austin keeping the site fast and findable. If you'd rather have us do it than read about it, book a session or explore our photography services in Leeds.