


The right makeup for headshots is your own face, just more defined for the camera. That means even skin, controlled shine, and features that read clearly under studio or phone light, without SPF, chunky shimmer, or anything that flashes back white. The rest of this guide walks through the right products, a step-by-step routine, how to test your look against the actual light you’ll be shot in, and the small kit worth packing on the day.
TL;DR:
- Use a satin or natural matte SPF-free foundation that matches your neck to prevent flashback and uneven shine under studio lighting.
- Apply thin, buildable layers of base products with a stippling sponge or buffing brush to maintain a natural, skin-like appearance on camera.
- Test your makeup under the same lighting conditions and device as your shoot to identify issues like flashback, fading, or color shifts well in advance.
- Keep eye and brow makeup soft and defined, with subtle contour and higher blush placement to avoid flattening features under bright lights.
- Pack a minimal kit with blotting papers, a matching lip product, a small concealer, and setting spray for quick touch-ups between shots.
Table of Contents
- Choosing makeup for headshots: products and finishes that actually photograph well
- How do you apply makeup for headshots step by step?
- How lighting changes the makeup that works on camera
- Common headshot makeup mistakes and how to fix them fast
- What to pack: a minimal on-set touch-up kit
- How professional studios brief makeup before a shoot
- Should you wear false lashes for a headshot?
- A quick word before your session
- Book a headshot session with Dock Street Studio in Leeds
- Sources
- FAQ
Choosing makeup for headshots: products and finishes that actually photograph well
Camera lenses and studio lighting pick up texture and shine that the naked eye simply skips over. That’s why makeup built for camera work favours light, skin-like finishes over heavy coverage — a thick, full-coverage foundation reads as a mask the moment a strobe hits it, flattening your features instead of defining them.
Finish matters more than most people expect. A natural matte or soft satin foundation sits well under flash and continuous light, while anything with mica or shimmer particles catches light unevenly and creates hotspots across the cheeks and forehead. Skip SPF-containing foundations on shoot day specifically: titanium dioxide and zinc oxide, common in sunscreen formulas, reflect flash light back at the lens and cause a pale, ghostly cast known as flashback. Wear your sunscreen earlier in the day and let it sink in fully, then apply a separate SPF-free base for the shoot itself.
When it comes to setting, professionals lean towards satin to soft-matte finishes and finely-milled powders rather than heavy translucent layers, which can sit in fine lines or “bake” under hot studio lights. A setting spray designed for camera work locks everything in place without adding the greasy sheen that oil-based sprays leave behind.
What to look for on the shelf or in your kit:
- Foundation: buildable, SPF-free, satin or natural matte finish, shade-matched to your neck and chest rather than just your jawline
- Setting powder: finely milled, translucent or lightly tinted, with no visible white cast when pressed onto skin
- Setting spray: a flash-safe formula rather than a dewy, oil-heavy mist
- Blending sponge: for thin, seamless layers of base that don’t sit on the surface
- Dense stippling brush: buffs product into skin rather than smearing it, which matters hugely under raking studio light
- Small concealer brush: precision only where you need it, so you’re not caking product across areas that are already even
A quick housekeeping note that photographers rarely say out loud: test any new product days before the shoot, not on the morning of it. Unfamiliar formulas can behave unpredictably under hot lights, and the last thing you want is a reaction or an unexpected sheen showing up in the first frame.
How do you apply makeup for headshots step by step?
Getting camera-ready makeup right is less about buying better products and more about sequencing the application correctly. Rushing the base, or doing your eyes before checking your skin under light, is how small mistakes compound into a look that needs redoing halfway through a session.
Pro Tip: Do your base first and check it under the same light you’ll be photographed in before moving to eyes or lips. Correcting a patchy foundation is easy at step two; it’s a nightmare once your full look is finished.
1. Prep skin according to your type
Dry skin needs hydration before anything else. A hydrating serum followed by a lightweight moisturiser gives foundation something to grip onto, rather than sitting on flaky patches and drawing attention to them. Oily zones, typically the T-zone, benefit from a mattifying primer applied only where shine tends to build. Drinking enough water in the days before your shoot also genuinely shows up on camera. Well-hydrated skin has a smoother texture and reflects light more evenly, which is exactly what a lens rewards.
2. Build your base in thin layers
Apply foundation with a damp sponge or stippling brush in two or three thin passes rather than one heavy coat. Match the shade to your neck, not just your face, since headshots often crop wider than you expect and a visible colour break at the jaw is instantly noticeable in a still image. Conceal only where you genuinely need it, dark circles, blemishes, redness, and resist the urge to conceal skin that’s already even. Set with powder only across the T-zone; leaving cheeks and temples unpowdered keeps a natural sheen that reads as healthy rather than flat.
3. Restore dimension with contour and blush
Studio and flash lighting flatten the face, so the definition contour normally gives you in daylight disappears under strobes. Apply a cream or powder contour along the hollows of the cheeks, the temples, and lightly under the jaw, then blend thoroughly so there’s no visible edge. Blush goes higher on the cheekbone than you’d wear it day to day, and slightly more saturated. Camera sensors desaturate colour, so what looks a touch too pigmented in the mirror often reads as perfectly natural once photographed.
4. Keep eyes defined but soft
Heavy liner and hard lid lines rarely photograph well for headshots; they read as harsh rather than polished. Instead, work a shallow wash of a neutral shade across the lid, tightline along the upper lash root with a soft brown or black pencil to add subtle definition without a visible line, and finish with a lengthening mascara on the top lashes. If you want extra lash density without full strip lashes, natural lash clusters placed only at the outer corners open the eye without looking obviously “done.”
5. Fill and set brows with intention
Brows anchor the whole face in a headshot, and thin or unfilled brows tend to disappear entirely under flat lighting. Use a fine-tipped pencil or brow pen to add light, hair-like strokes rather than solid blocks of colour, following your natural growth pattern. Set with a clear or tinted brow gel. Aim for roughly 30% more definition than you’d wear on an ordinary day; that extra pigment is what reads as “naturally groomed” rather than “bare” once the camera flattens it back down.
6. Choose and set your lip colour
Pick a shade one step deeper than your everyday choice, since lips are one of the first things that wash out under strong light. Line the lips lightly with a pencil close to your natural lip colour to hold the shape, fill in with lipstick, blot with a tissue, then reapply a thin second layer. That blot-and-layer method significantly extends how long colour survives through a session of repeated takes and angle changes.
7. Test the full look before you commit
Once your face is done, take a photo, ideally on the same device or camera that will shoot the session, under the same lighting. Check for flashback around the T-zone, whether the lip colour has already faded, and whether brows still read clearly at a distance. Small corrections here take two minutes; catching the same issues twenty minutes into a paid session does not.
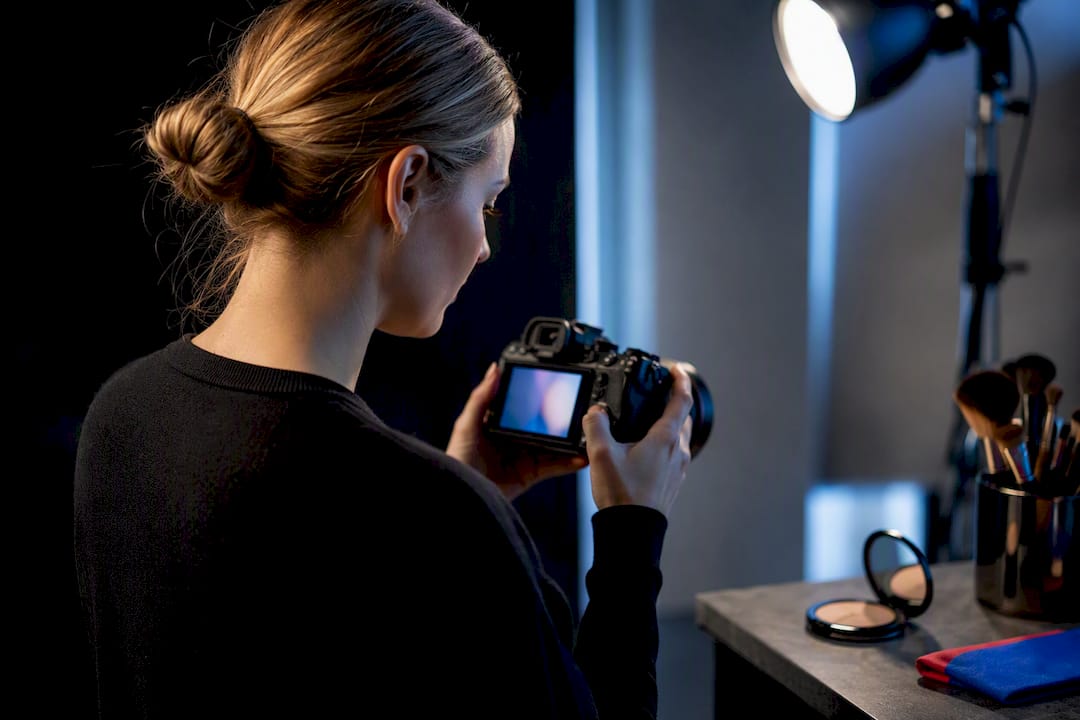
How lighting changes the makeup that works on camera
The light source you’re shooting under changes what “correct” makeup actually looks like, which is why a look that photographed beautifully at a friend’s ring-light setup can flashback badly under a studio strobe.
- On-camera flash and studio strobes are the harshest test for shine and reflective ingredients; they’re also where flashback from SPF or shimmer products shows up most obviously.
- Ring lights, popular for phone self-tapes and video, tend to flatter satin finishes and can exaggerate texture less than a direct flash, but they run warmer and can shift foundation shade slightly yellow.
- Natural window light is the most forgiving for texture but the least predictable for colour accuracy, since it changes throughout the day.
- Continuous studio lighting, common in professional headshot setups, sits between flash and daylight: strong enough to reveal texture, steady enough to check your look on a monitor before shooting begins.
A short camera test settles most of this before you’ve committed to a full face of makeup. Take one shot with flash and one without, on the exact device or camera that will be used for the session, and check specifically for flashback, washed-out lips, or brows that have lost their edge. If flash is involved, going half a shade darker on foundation than feels right in the mirror usually reads as correct once the flash fires, since flash and sensor combinations consistently desaturate skin tone. For ring-light or continuous-light setups, favour a satin finish over full matte, which tends to look chalky under that particular light quality.
Common headshot makeup mistakes and how to fix them fast
Most makeup problems that surface mid-shoot are fixable in under a minute, provided you know what’s actually causing them.
- Flashback (a pale, powdery cast): almost always caused by SPF, mineral sunscreen ingredients, or too much translucent powder; blot lightly and, if it persists, switch to a different foundation entirely rather than layering more product on top.
- Over-powdered, flat-looking skin: a light mist of setting spray followed by a touch of cream blush on the cheeks restores the dimension that heavy powder strips away.
- Harsh, drawn-on brows or liner: run a clean spoolie through both to soften the edges, then add a tiny amount more product only where it genuinely needs it, rather than starting again from scratch.
- Lip colour that’s vanished by the third setup change: reapply a deeper shade than you started with and blot once, since a slightly stronger colour survives repeated takes far better than a light one.
- Forgetting the basics between shots: keep blotting papers, a touch-up concealer, and your original lip product within reach so fixes take seconds, not minutes.
What to pack: a minimal on-set touch-up kit
A headshot session rarely allows for a full makeup redo between setups, so the kit that matters most is a small one you can reach for in seconds.
- Blotting papers, not powder, for removing surface oil without disturbing the base underneath
- Pressed translucent or finely-milled powder, used sparingly and only on visible shine
- Your exact lip product from application, so touch-ups match rather than shift the shade
- A small concealer stick or pot, for any last-minute redness or shadow under the eyes
- A clean spoolie, for softening brows between angles
- Clear brow gel, to reset flyaways without adding colour
- A travel-size setting spray, for a light refresh between wardrobe or angle changes
Blot in gentle presses rather than rubbing, working from the centre of the face outward, and only reapply powder to areas that are actually shining, not as a blanket refresh. Many photographers keep blotting papers on hand and prefer clients bring the exact lip shade used at application, so touch-ups stay invisible rather than obvious. On a professional set, defer to the photographer’s read on timing; they’ll usually flag a touch-up moment between setups rather than mid-shot.
How professional studios brief makeup before a shoot
At Dockstreetstudioleeds, makeup planning happens before anyone walks into the studio, not on the day itself. Clients booking a headshot session are asked about the intended use of the images, corporate profile, casting submission, or a more editorial brand shoot, because that shapes the lighting setup, which in turn shapes what makeup finish will actually hold up on camera.
Pre-shoot planning means the lighting is already set and tested before makeup even goes on, so there are no surprises about flashback or shine once the camera starts firing. A brief that’s clear from the start is what makes the whole session run smoothly.
Professional studios favour flash-safe finishes for the reasons covered above: satin over shimmer, SPF-free bases, and finely-milled setting powder. On the day, expect brief touch-up windows between setups and retouched files delivered promptly. For a fuller walkthrough of what a session involves, the professional headshot session guide covers the studio’s approach in more detail.
Should you wear false lashes for a headshot?
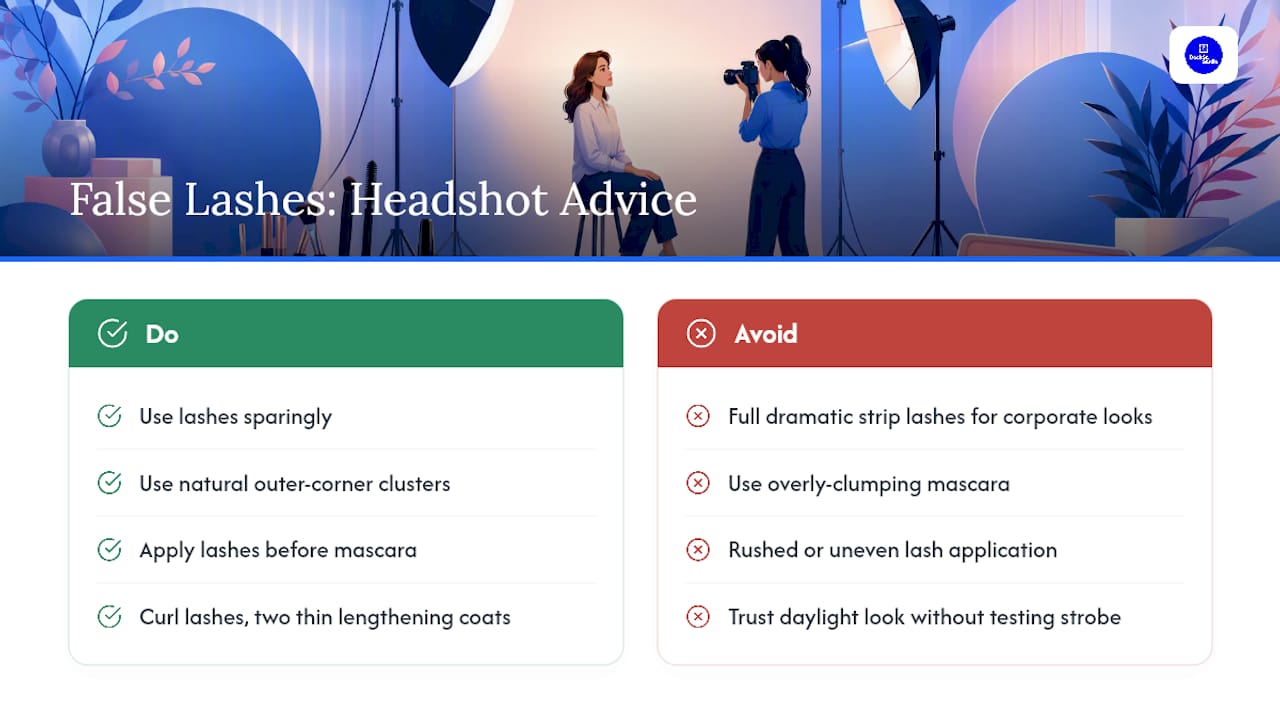
False lashes can work for headshots, but only in moderation, and the wrong pair will read as obviously fake the moment a strobe fires straight at your face. Full, dramatic strip lashes tend to look overdone in a still, tightly cropped image, especially for corporate or professional headshots where the goal is approachable, not glamorous.
Natural lash clusters, applied only to the outer corners of the eye, tend to work best. They open the eye and add subtle length without creating a hard, obviously-glued line along the lash root. If you’d rather skip lashes altogether, a good lash curl followed by two thin coats of a lengthening (not overly clumping) mascara achieves a similar lift with far less risk of looking artificial or shifting mid-session.
For creative or editorial headshots, where a bolder look is often expected, a fuller lash can work well, but check it under the actual shoot lighting first. A lash that looks glamorous in daylight can look heavy and cast an odd shadow under a direct strobe. Whatever you choose, apply lashes before mascara so you can blend the lash line naturally into your own lashes rather than leaving a visible seam. And if you’re not confident applying them yourself, a light coat of mascara alone photographs more reliably than a rushed, uneven lash application.
A quick word before your session
The goal was never to look like someone else. It’s to look recognisably like you, just camera-ready. Run a quick flash test with blotting paper on hand before you start, then trust the routine you’ve practised. Bring the small kit. That’s genuinely most of the work done before you’ve even sat down in front of the lens.
— Mark
Book a headshot session with Dock Street Studio in Leeds
A professional studio setup gives you what a DIY setup at home can’t: pre-tested studio lighting, a photographer checking your look through the lens rather than a bathroom mirror, and retouched files delivered promptly rather than with long delays. A headshot session includes pre-shoot planning around your brief, so lighting is calibrated before you arrive, and you can request a professional hair and makeup artist on the day if you’d rather not manage your own touch-ups between setups. Pricing starts from £450, detailed on the commercial photography service page. If you want rapid retouching, HMUA support, or simply a studio that’s already thought through the lighting and flashback issues covered above, get in touch to check availability and lock in a date.
Sources
- Makeup for Camera: Getting Looks Right in HD and 4K
- How to do makeup for a photoshoot
- Why Your Makeup Looks Different On Camera—Science-Backed Fixes
- Headshot makeup: Complete guide for professional photos (2026)
FAQ
What is the best makeup for headshots?
A satin or natural-matte, SPF-free foundation matched to your neck, finely-milled setting powder used only where needed, and slightly deepened lip and brow colour work best, since flash and camera sensors desaturate colour and can flashback off SPF ingredients.
Can you wear makeup for headshots?
Yes, and most professional headshot guidance recommends it: the aim is a natural, slightly more defined version of your everyday look rather than a bare face, since studio lighting flattens features and light, camera-calibrated makeup restores that definition.
Should I wear my hair up or down for a headshot?
This depends on your brief rather than makeup rules, but keeping hair away from the face highlights the definition work you’ve done on brows, eyes, and contour, which is often the point of a headshot in the first place.
What colours should you avoid for a headshot?
Avoid anything with visible shimmer or glitter on the skin, since studio lighting creates harsh, unflattering reflections off chunky shimmer particles, and steer clear of very pale or frosted lip shades, which tend to wash out completely under flash or strobe lighting.
Recommended
Shot, written and built by the Dock Street team
Every guide on this blog comes from the team at Dock Street Studio — Mark behind the camera with 18+ years' experience, Nicole on styling and lighting, Beya on video and bookings and Austin keeping the site fast and findable. If you'd rather have us do it than read about it, book a session or explore our photography services in Leeds.