


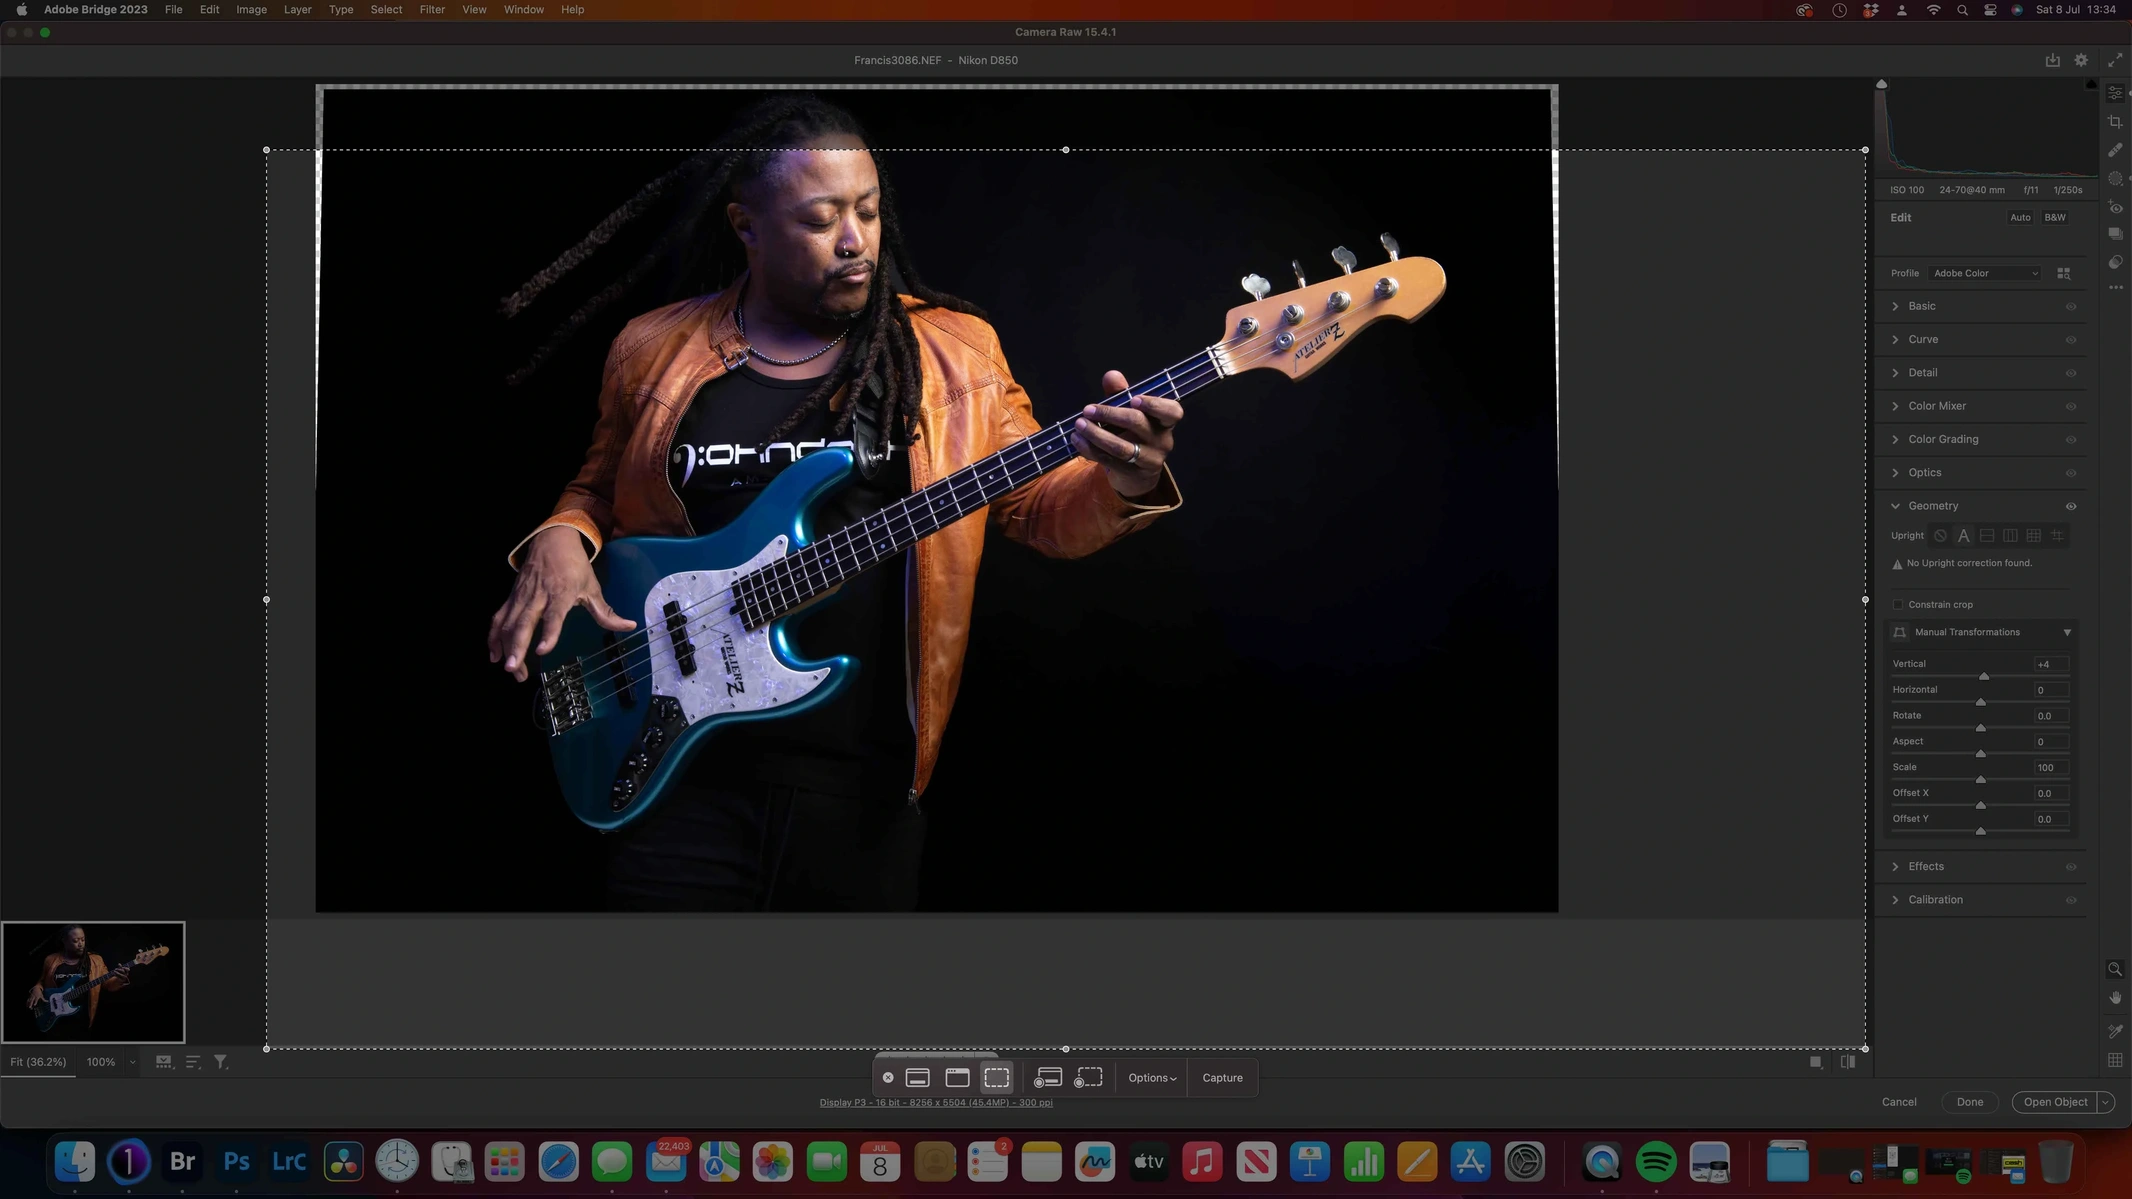
Editing a raw photograph well is a different skill to shooting it — and the tools that do it don't need to be complicated to be effective. Here's a practical run-through of the Adobe Camera Raw and Adobe Bridge workflow: lighting, masking, and geometry, the three settings that do most of the work.
Software
Adobe Camera Raw and Adobe Bridge are a solid starting point. They're straightforward to use without compromising on the options available, and after a good stretch of using both, they've offered plenty of tools without throwing up problems along the way.

Lighting and exposure
The first step to turning a flat, ordinary image into one that grabs attention is adjusting the lighting. The easiest way is the exposure slider in Camera Raw — right to brighten, left to darken. Once the brightness is right but the colours still feel flat, the saturation slider gives the image more life without needing a full colour grade.
Masking
Masking means editing specific areas of the image and changing the settings for just that region, using AI-assisted selection. The masking tool sits on the right of the screen, with options to select people, subject or background automatically. The brush tool adds more control on top — adding or subtracting areas by hand for finer editorial control over the final result.


Geometry
Geometry settings rotate and straighten an image — useful if a shot came out slightly slanted. Vertical and horizontal tilt can also be adjusted here where needed. Go carefully: pushed too far, these settings will do more harm than good to the final look.

Where this fits at Dock Street
This is the same editing discipline behind every session at Dock Street Studio — exposure, masking and geometry are the difference between a technically fine raw file and an image that's actually ready to use. It's also why we shoot tethered: getting exposure and framing right in camera means less to fix in the edit, and retouched selects delivered within 48 hours rather than days.
Conclusion
There's a lot of scope for image manipulation in software like Adobe Camera Raw and Adobe Bridge — masking, the brush tool and geometry settings, used correctly, do most of the heavy lifting. Editing stills is a genuinely different skill from video editing, calling on different tools entirely, but both are rewarding in their own way once you know where to look.
Frequently Asked Questions
Is Camera Raw enough, or do I need Photoshop too?
For most exposure, colour and masking work, Camera Raw and Bridge cover it. Photoshop earns its place for more involved retouching — removing objects, complex composites, detailed skin work.
How much editing is too much?
If the geometry or saturation changes are visible as edits rather than improvements, you've gone too far. The best edit is usually invisible.
Do you offer editing services separately from a shoot?
Editing is included in every headshot and commercial booking at Dock Street Studio. Get in touch if you need a separate retouching job.
Where is the studio and how do I book?
Dock Street Studio, Unit 9, 30–38 Dock Street, Leeds LS10 1JF — central Leeds near Leeds Dock, a short walk from the train station, with parking on site. Book online or call to talk it through first.
Book a session at Dock Street Studio, Leeds
Every session includes professional retouching, so the image you leave with is ready to use, not a raw file you have to fix yourself. Book online, email hello@dockstreetstudioleeds.co.uk, or call 0113 4400102.
About the author
Josh Flavell
Shot, written and built by the Dock Street team
Every guide on this blog comes from the team at Dock Street Studio — Mark behind the camera with 18+ years' experience, Nicole on styling and lighting, Beya on video and bookings and Austin keeping the site fast and findable. If you'd rather have us do it than read about it, book a session or explore our photography services in Leeds.